Let’s Install:
Replicator 2 Heater Block Assembly
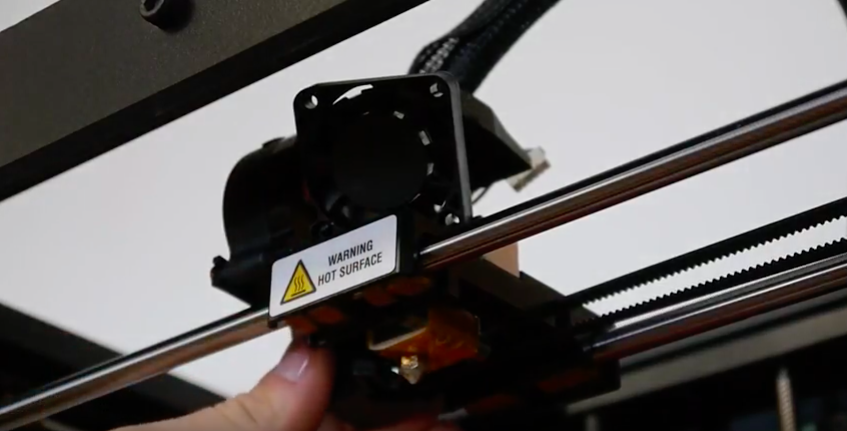
You received your new Heater Block Assembly and are wondering how to install it. Follow along with the video or instructions below and you’ll be set.
As always, turn off and unplug your machine before doing any repair work.
- 5MM Hex Key
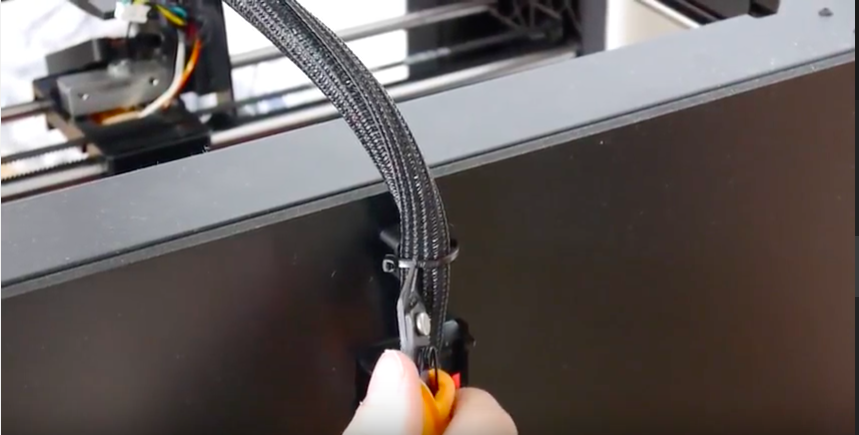
- Side/flush cutter or scissors
- Crescent wrench
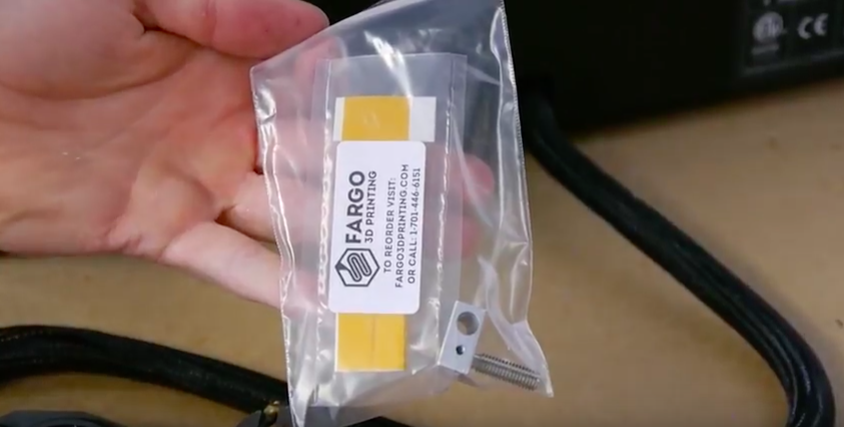
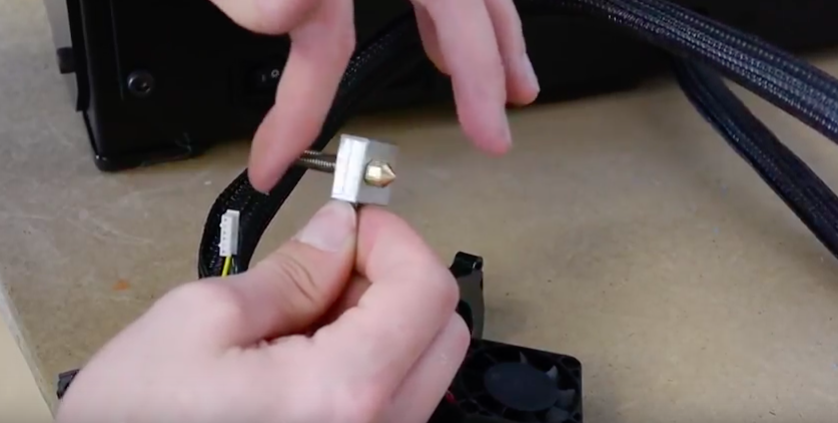
- MakerBot Replicator 2 Heater Block Assembly
7
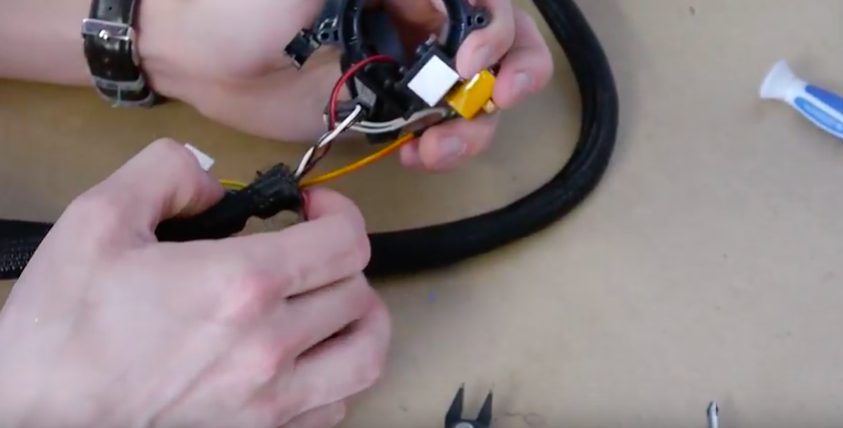
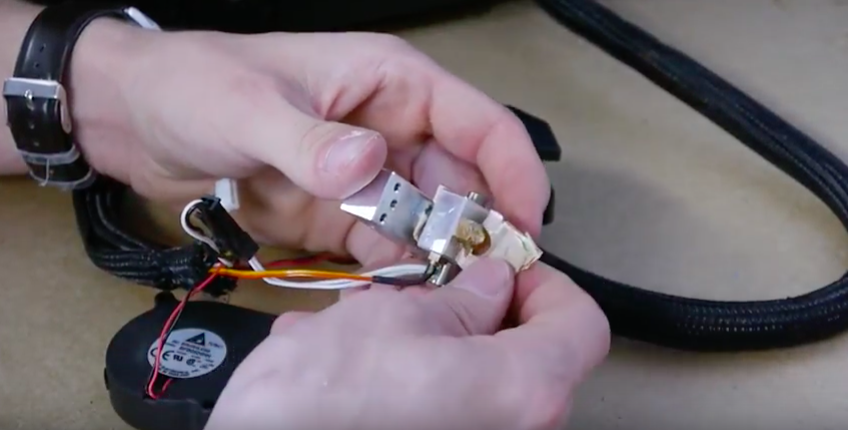
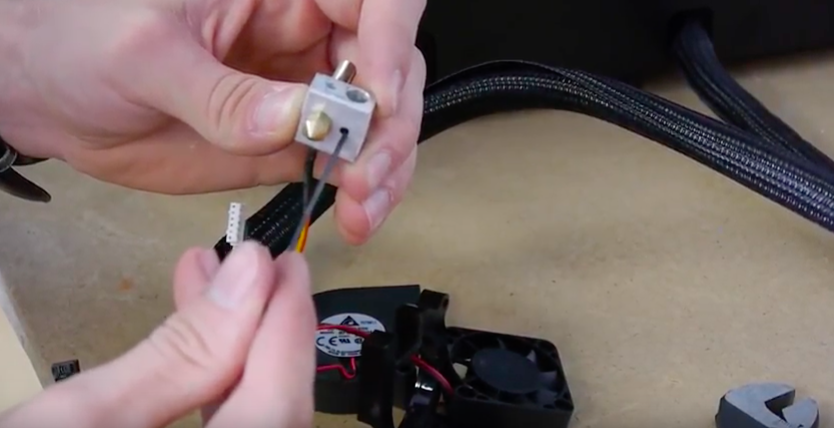
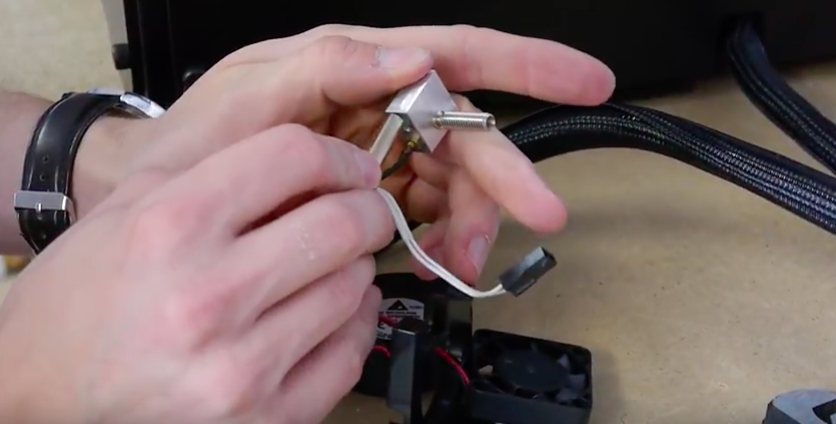
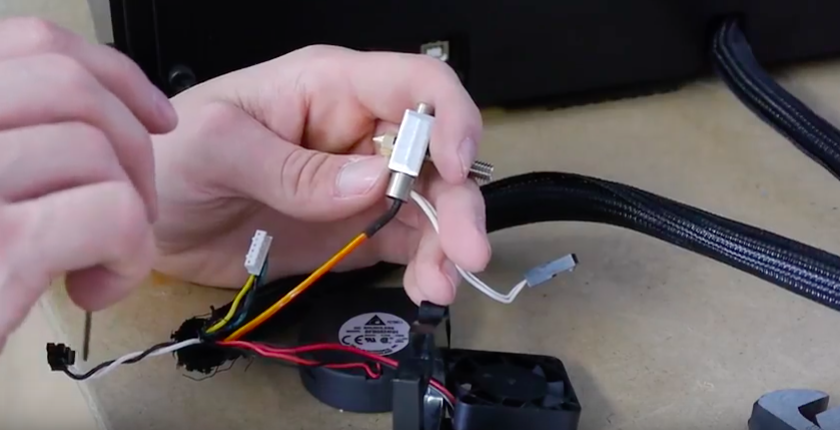
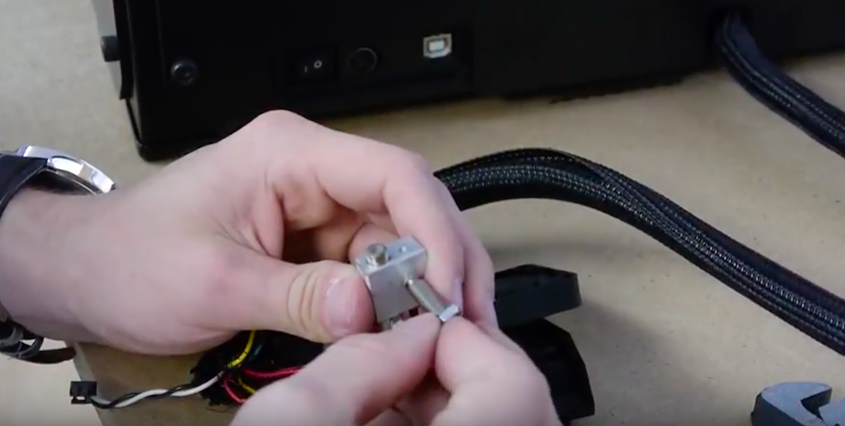
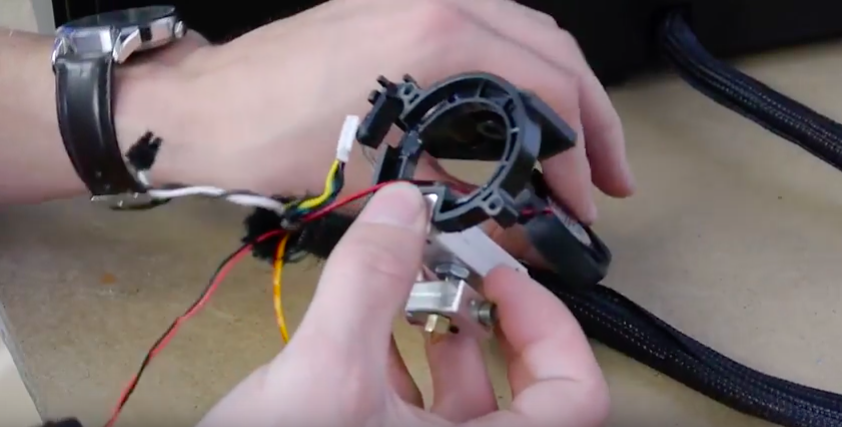
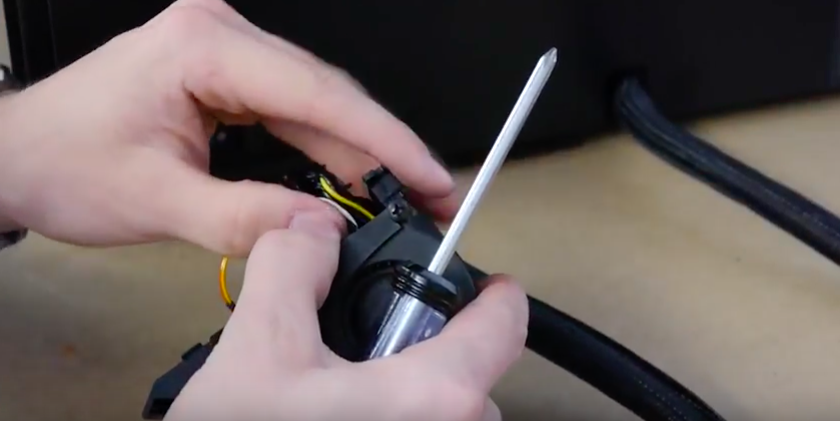
Screw the thermistor onto the right side of the heater block assembly and the heater cartridge will go on the left side.
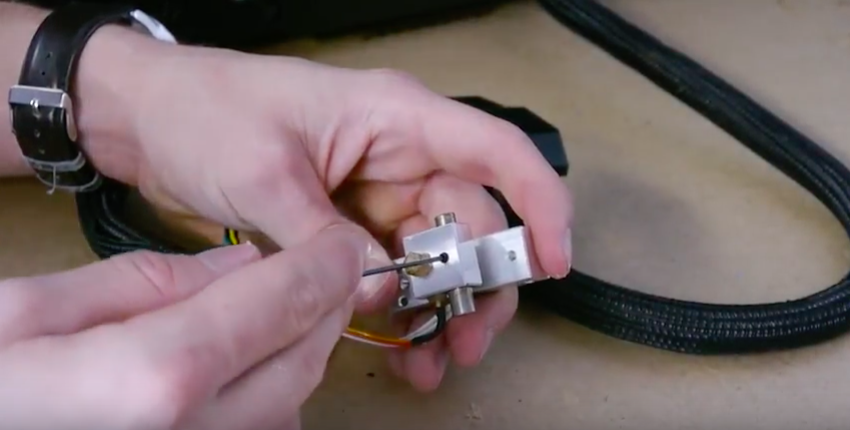
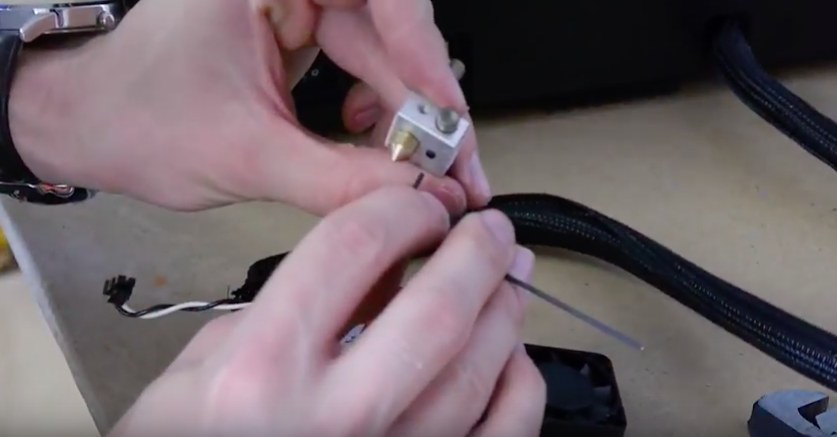
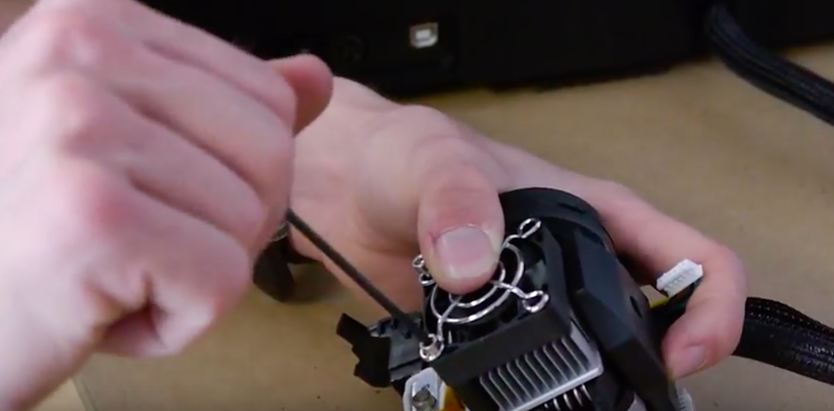
- Unscrew the set screw and make sure it is flush with the bottom.
- Push heater cartridge back into the heater block. The cord should be facing to your right or towards the thermistor.
8
Screw set screw to lock in place. (Do not overtighten as you may strip the screw.)
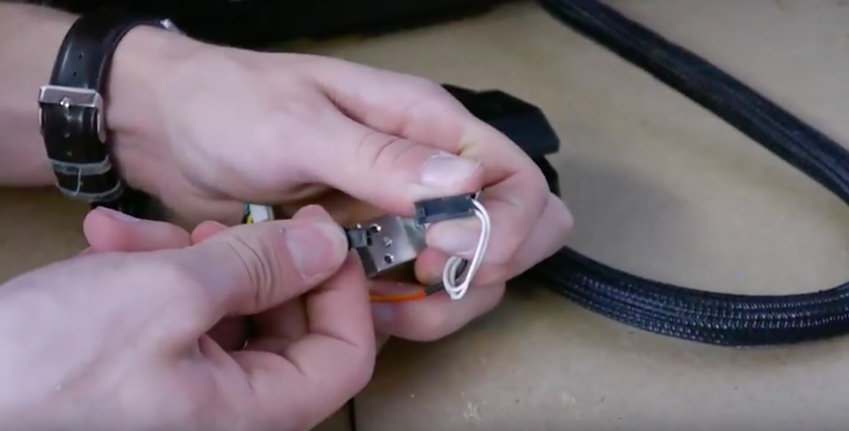
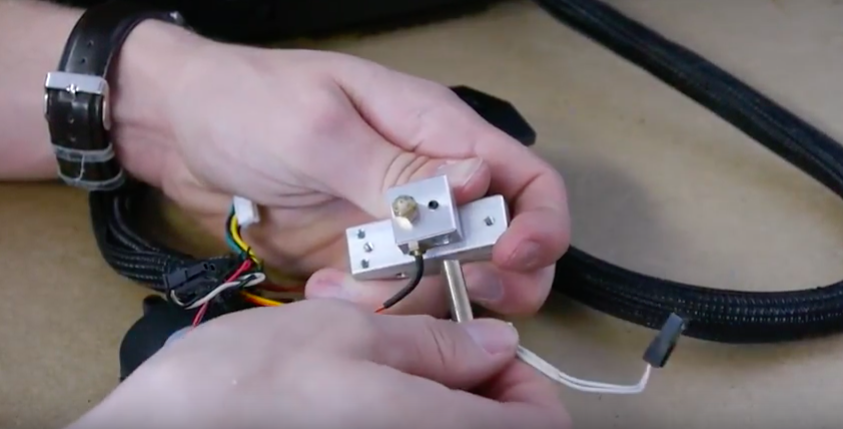
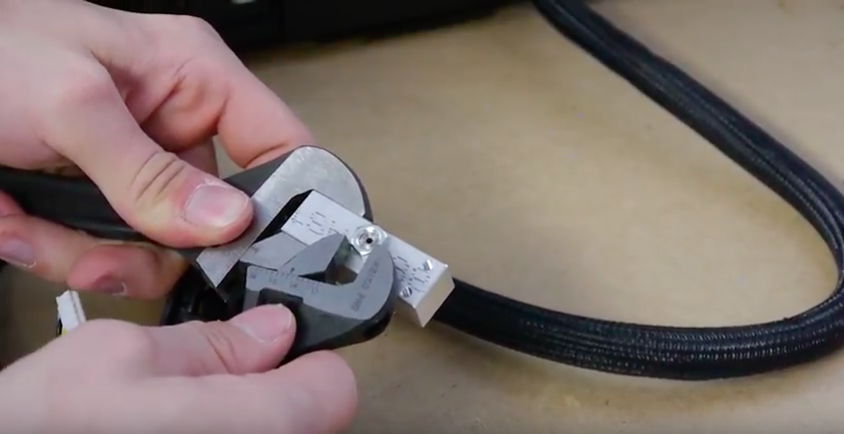
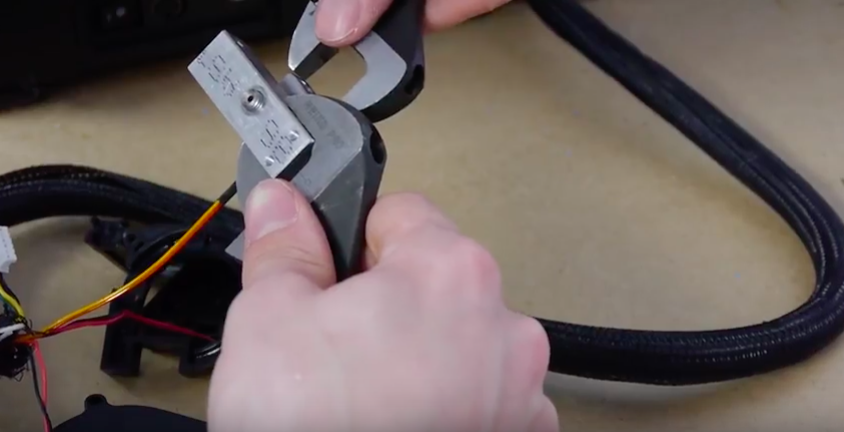
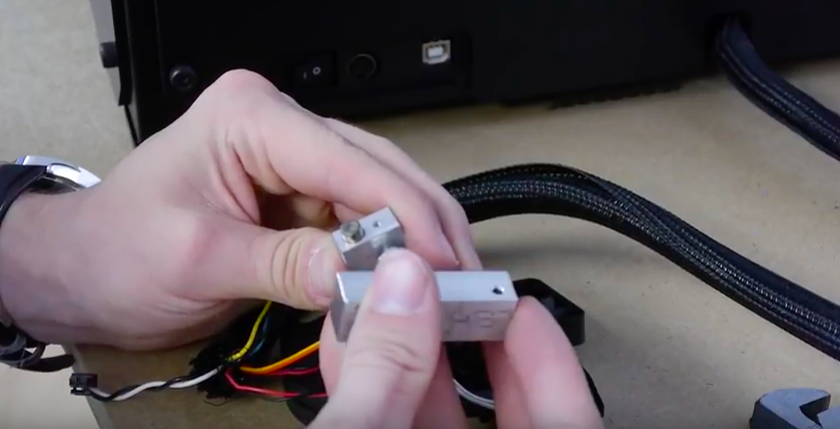
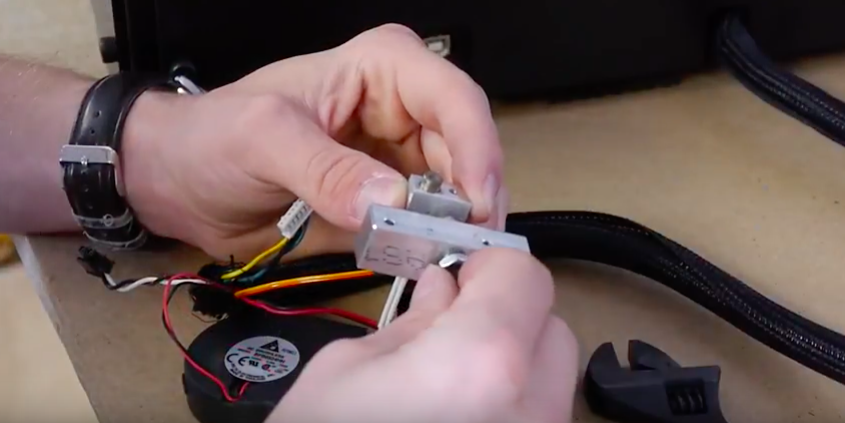
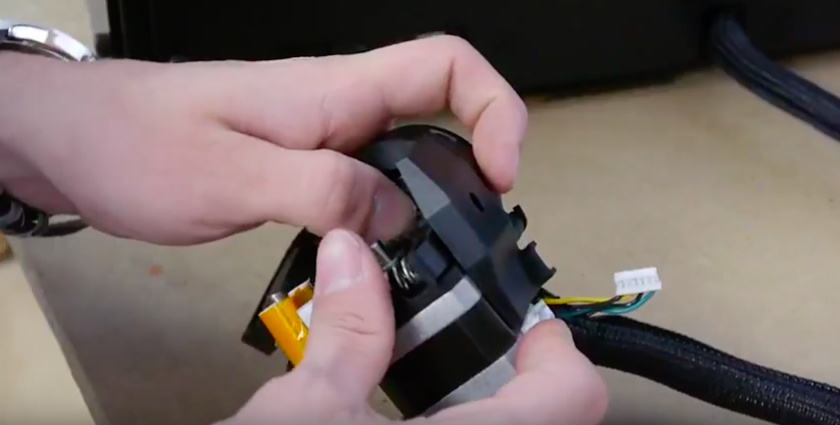
- Screw nut to the open part of the threads and put bar mount piece back onto the screw. Make sure the four-holed side is facing the heater block. The two holes in the front should be on the right side of the bar mount piece.
- Place other nut back onto the top of the bar mount assembly. The bar mount piece should be parallel to the heater block piece.
9
The nut on the top of the bar mount piece should be flush with the thermal barrier tube.
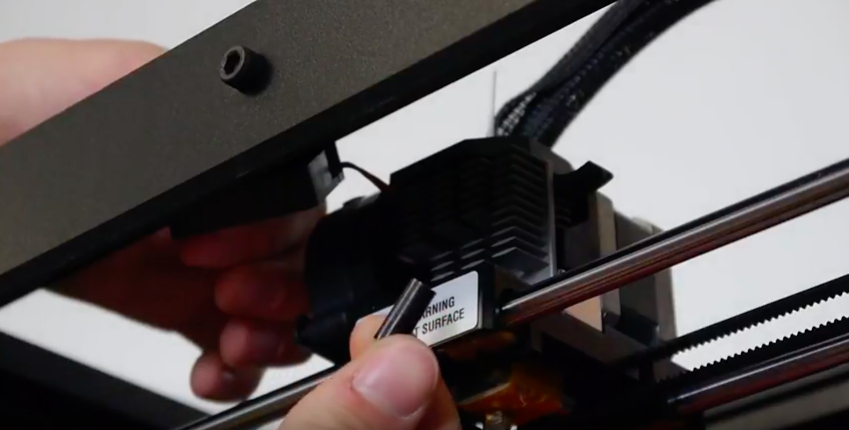
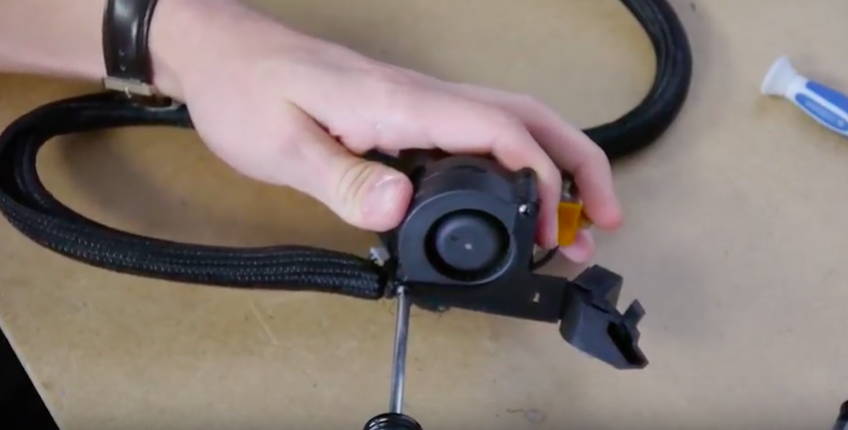
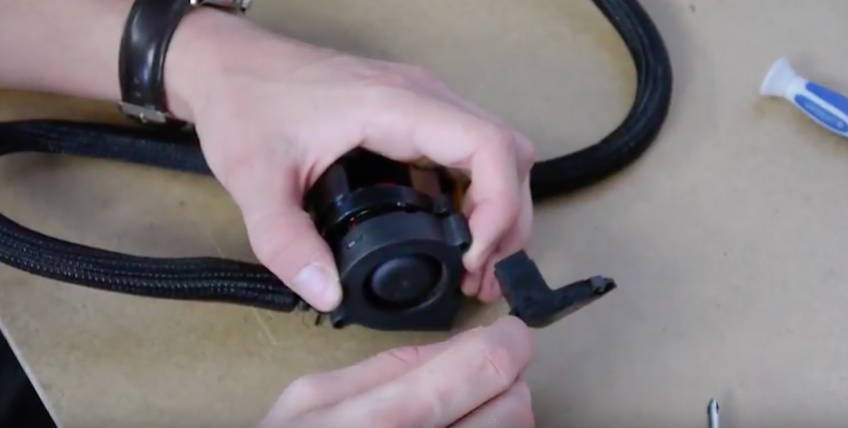
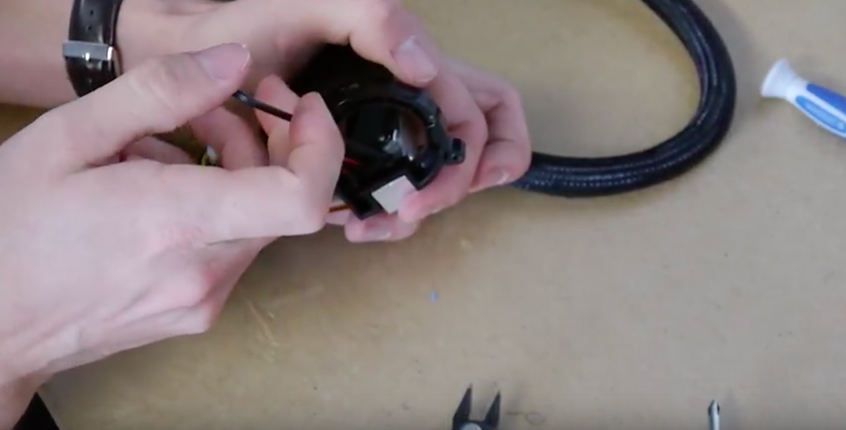
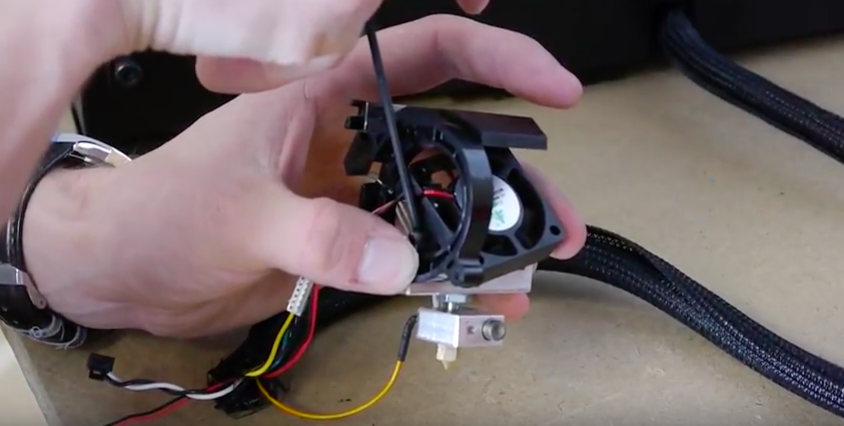
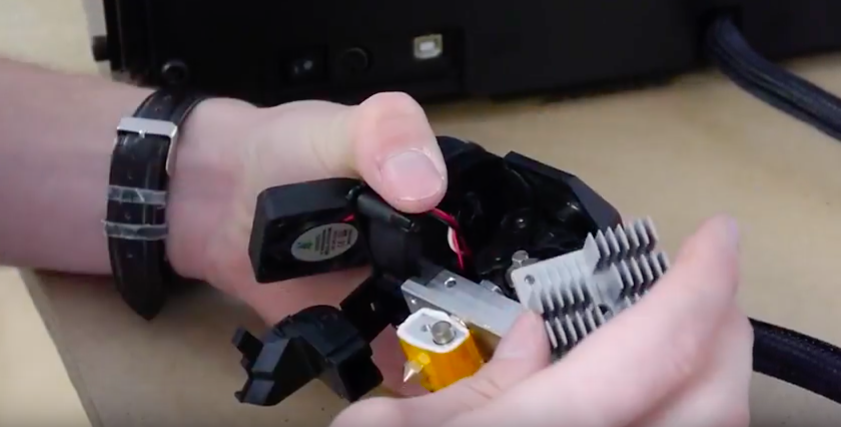
- Put the plastic piece back onto the side. Make sure the overhang is over the bar mount assembly and fan is still through the plastic piece.
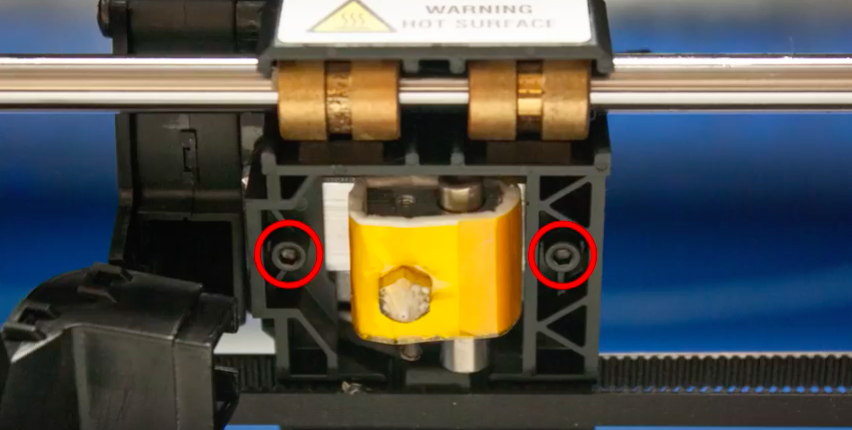
- Take two hex nuts and screw those back through the plastic piece onto the bar mount assembly.
10
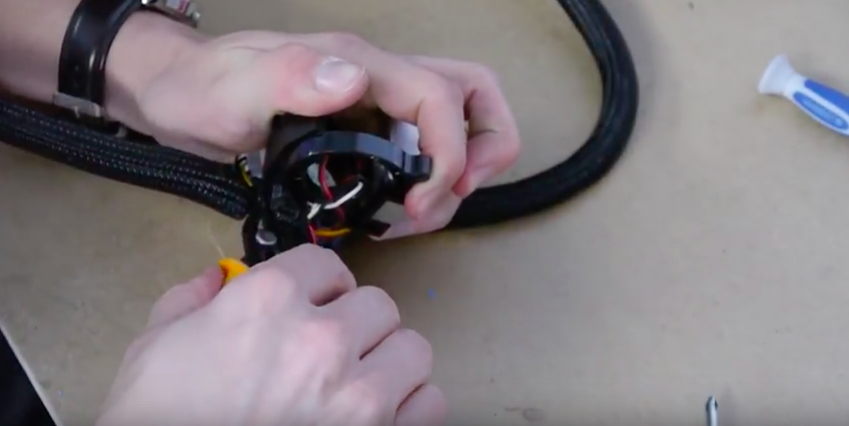
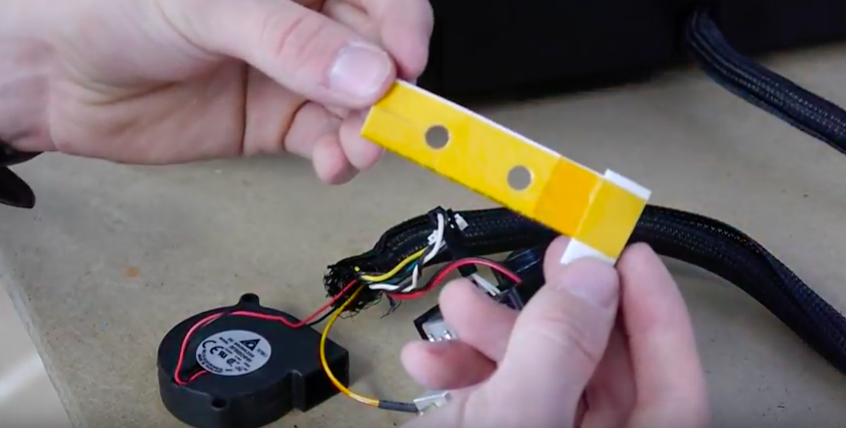
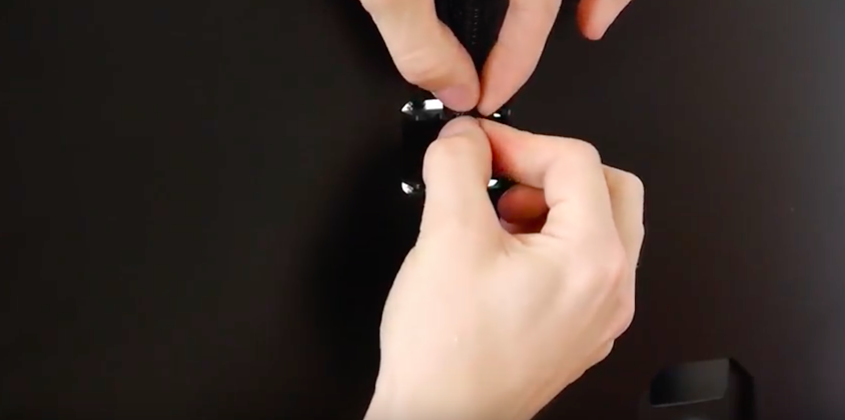
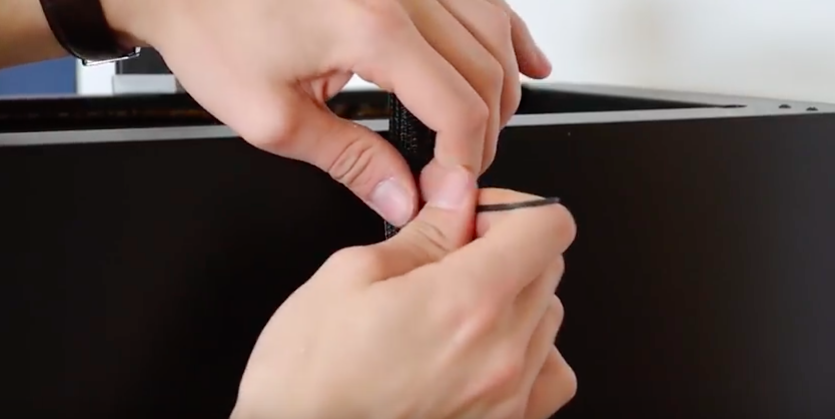
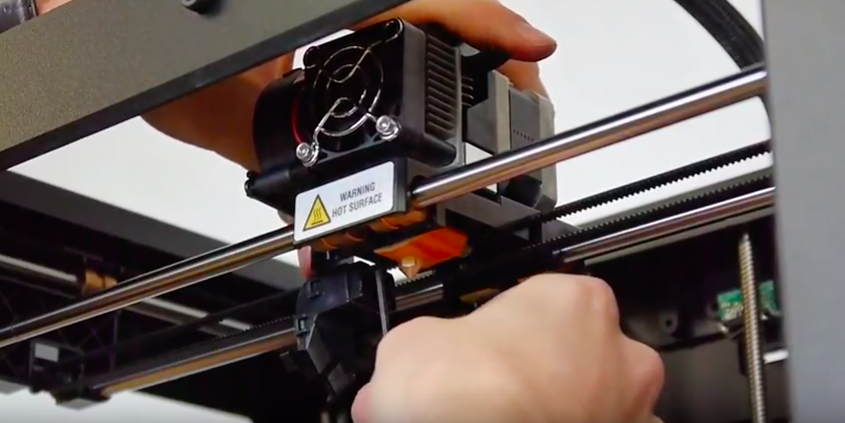
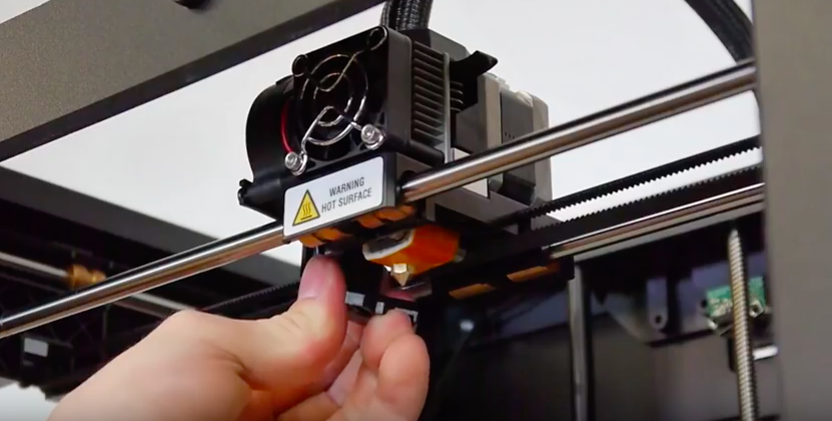
Put the ceramic insulation tape around the heater block.
- Ceramic Insulation Tape Installation Instructions.
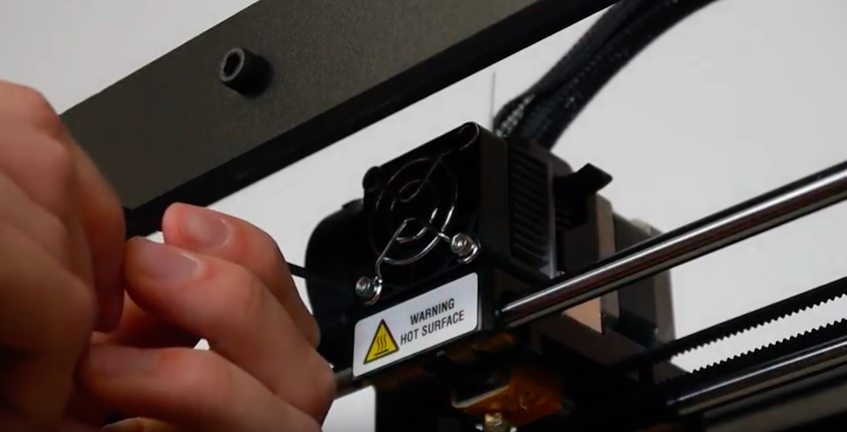
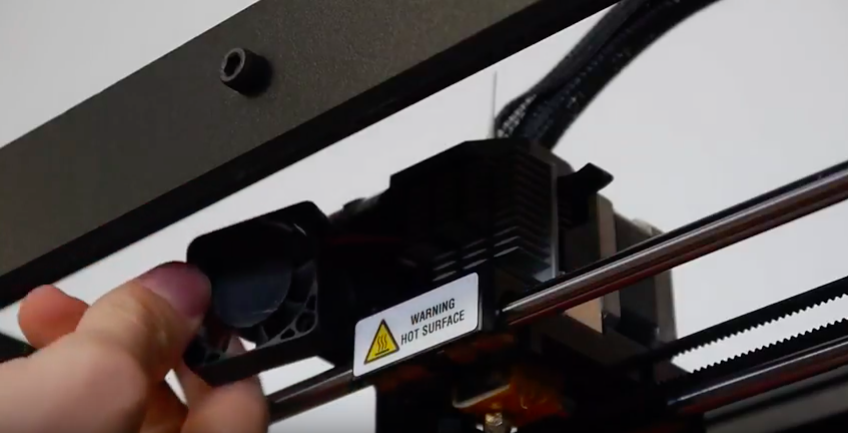
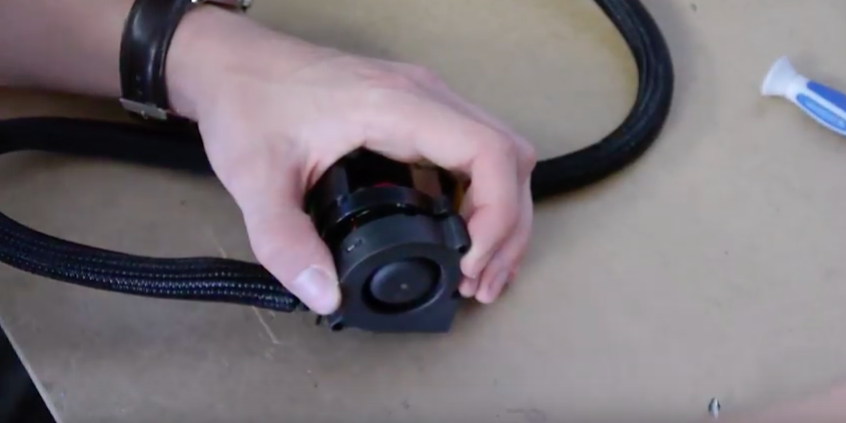
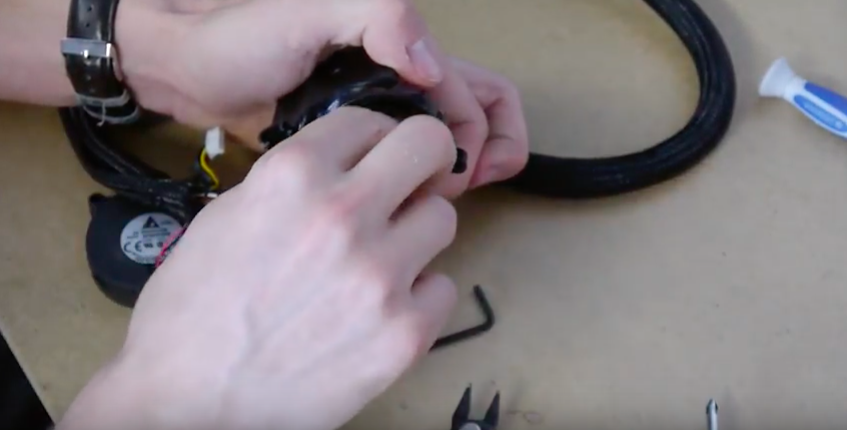
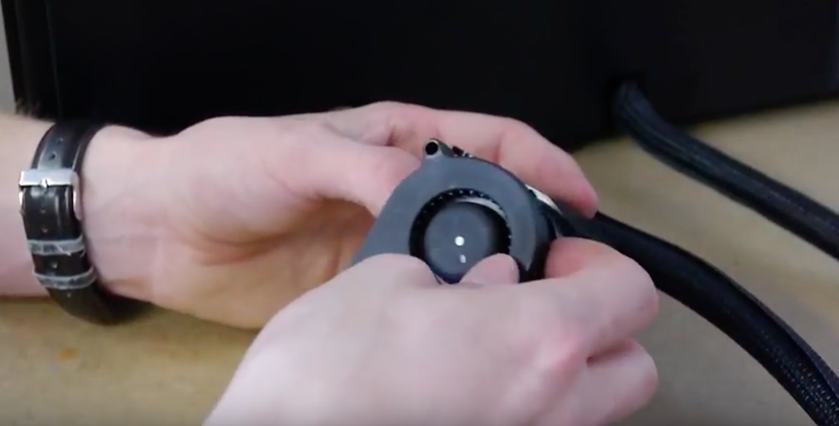
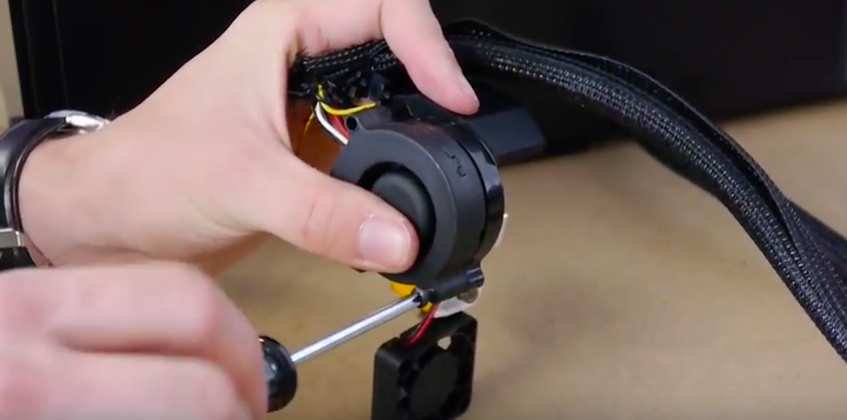
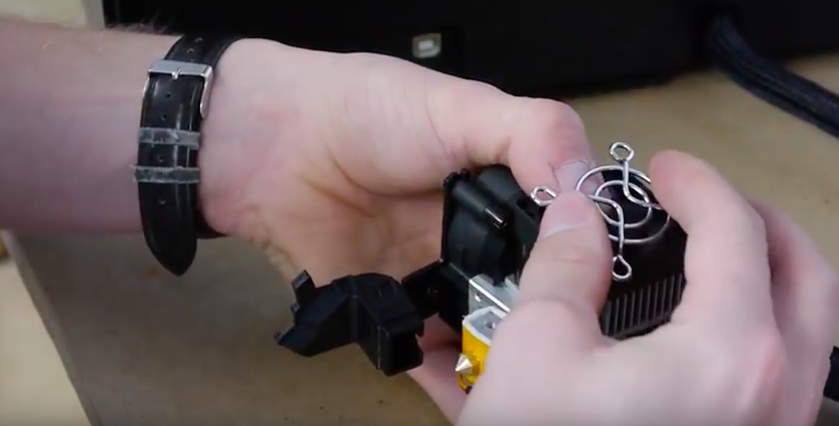
- Put on blower fan. Screw Philips screws back onto plastic piece.
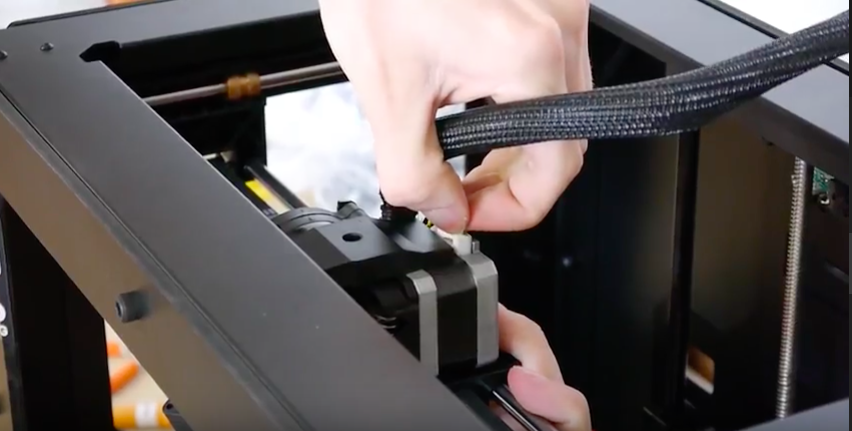
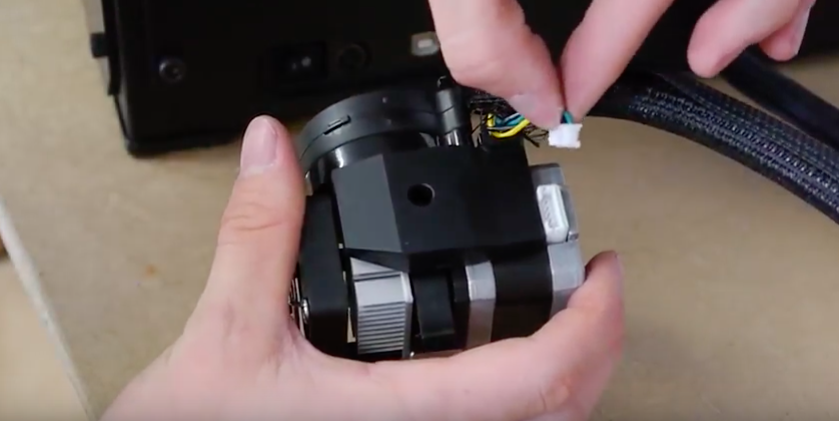
- Put plastic blower duct onto blower fan and screw down. Put the stepper motor back on.



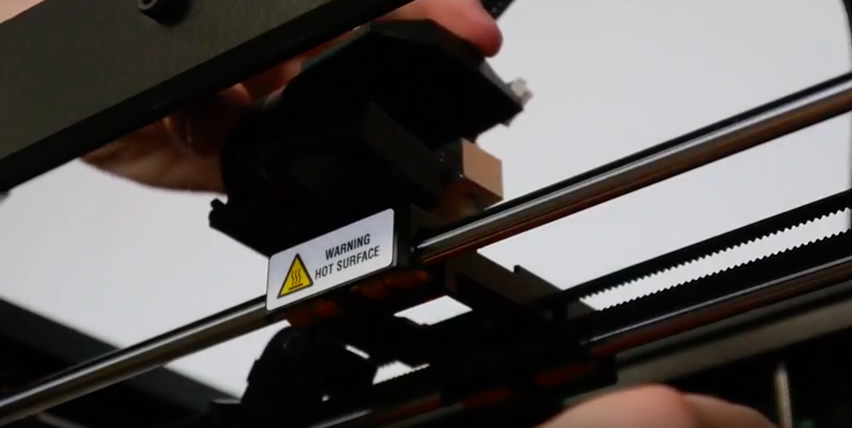






I think other web site proprietors should take this website as an model, very clean and fantastic user genial style and design, let alone the content. You are an expert in this topic!
There is perceptibly a bunch to know about this. I consider you made some nice points in features also.
Greetings from Florida! I’m bored at work so I decided to browse your site on my iphone during lunch break. I enjoy the knowledge you present here and can’t wait to take a look when I get home. I’m surprised at how fast your blog loaded on my mobile .. I’m not even using WIFI, just 3G .. Anyways, fantastic blog!
Thank you for sharing superb informations. Your site is very cool. I am impressed by the details that you’ve on this blog. It reveals how nicely you understand this subject. Bookmarked this web page, will come back for extra articles. You, my friend, ROCK! I found just the information I already searched everywhere and simply could not come across. What a great web-site.
https://stromectol.science/# ivermectin 10 ml
It’s appropriate time to make some plans for the future and it is time to be happy. I have read this post and if I could I desire to suggest you some interesting things or suggestions. Perhaps you could write next articles referring to this article. I wish to read even more things about it!
Fantastic goods from you, man. I have understand your stuff previous to and you are just too great. I really like what you’ve acquired here, certainly like what you are saying and the way in which you say it. You make it enjoyable and you still care for to keep it sensible. I can’t wait to read far more from you. This is really a tremendous web site.
I truly appreciate this post. I’ve been looking all over for this! Thank goodness I found it on Bing. You have made my day! Thanks again
Woh I like your articles, bookmarked! .
I like what you guys are up too. Such clever work and reporting! Keep up the excellent works guys I?¦ve incorporated you guys to my blogroll. I think it will improve the value of my web site 🙂
Great site. Lots of useful information here. I’m sending it to a few friends ans also sharing in delicious. And naturally, thanks for your effort!
You made some nice points there. I did a search on the topic and found most individuals will go along with with your website.
I truly value your work, Great post.
Have you ever thought about writing an e-book or guest authoring on other sites? I have a blog centered on the same subjects you discuss and would love to have you share some stories/information. I know my visitors would appreciate your work. If you’re even remotely interested, feel free to shoot me an e mail.
Great blog here! Also your web site loads up fast! What host are you using? Can I get your affiliate link to your host? I wish my website loaded up as quickly as yours lol
You completed certain fine points there. I did a search on the topic and found nearly all people will have the same opinion with your blog.
over the counter acne treatments over the counter pink eye medicine
Hiya, I am really glad I’ve found this info. Nowadays bloggers publish only about gossips and internet and this is actually irritating. A good blog with interesting content, this is what I need. Thanks for keeping this web-site, I’ll be visiting it. Do you do newsletters? Can not find it.
Aw, this was a very nice post. In idea I would like to put in writing like this moreover – taking time and precise effort to make an excellent article… however what can I say… I procrastinate alot and in no way seem to get one thing done.
I was wondering if you ever considered changing the structure of your website? Its very well written; I love what youve got to say. But maybe you could a little more in the way of content so people could connect with it better. Youve got an awful lot of text for only having 1 or two images. Maybe you could space it out better?
I like this internet site because so much utile stuff on here : D.
I really like your writing style, excellent info , appreciate it for posting : D.
This web site is really a walk-through for all of the info you wanted about this and didn’t know who to ask. Glimpse here, and you’ll definitely discover it.
I really value your piece of work, Great post.
over the counter cialis best over the counter yeast treatment
where can i buy viagra over the counter diuretics over the counter
Enjoyed reading through this, very good stuff, appreciate it.
I have been examinating out some of your posts and it’s pretty clever stuff. I will make sure to bookmark your website.
Thank you for every one of your efforts on this blog. Betty take interest in getting into investigations and it is simple to grasp why. I learn all of the lively tactic you present advantageous tricks through your web blog and as well foster contribution from some others about this situation while my girl is in fact discovering a lot of things. Take advantage of the rest of the new year. Your carrying out a terrific job.
over the counter steroid cream best over the counter nausea medicine
I do love the way you have presented this specific concern and it does present me some fodder for thought. However, because of just what I have personally seen, I basically trust as the responses stack on that individuals continue to be on issue and in no way start upon a tirade associated with some other news of the day. All the same, thank you for this superb piece and even though I do not really agree with this in totality, I respect the perspective.
You completed a few nice points there. I did a search on the matter and found mainly people will agree with your blog.
As I website possessor I think the content material here is real wonderful, appreciate it for your efforts.
I love it when people come together and share opinions, great blog, keep it up.
best over the counter allergy medicine best over the counter diet pills
I think this is one of the most significant information for me. And i am glad reading your article. But want to remark on some general things, The website style is great, the articles is really nice : D. Good job, cheers
https://over-the-counter-drug.com/# apoquel over the counter substitute
I would like to thnkx for the efforts you have put in writing this blog. I am hoping the same high-grade blog post from you in the upcoming as well. In fact your creative writing abilities has inspired me to get my own blog now. Really the blogging is spreading its wings quickly. Your write up is a good example of it.
I’m really enjoying the design and layout of your website. It’s a very easy on the eyes which makes it much more pleasant for me to come here and visit more often. Did you hire out a developer to create your theme? Exceptional work!
Some really grand work on behalf of the owner of this website , perfectly outstanding content.
epinephrine over the counter best over the counter sleep aid
over the counter muscle relaxer over the counter inhalers
But wanna comment on few general things, The website style and design is perfect, the subject material is really excellent. “Taxation WITH representation ain’t so hot either.” by Gerald Barzan.
It’s hard to find knowledgeable people on this topic, but you sound like you know what you’re talking about! Thanks
Really clean website , regards for this post.
I am glad to be a visitant of this everlasting weblog! , appreciate it for this rare information! .
Greetings! Very helpful advice on this article! It is the little changes that make the biggest changes. Thanks a lot for sharing!
Very interesting info !Perfect just what I was looking for! “The right to be heard does not autmatically include the right to be taken seriously.” by Hubert Humphrey.
I am impressed with this website , very I am a fan.
https://drugsoverthecounter.shop/# over the counter pills like viagra
I like this web site very much, Its a real nice spot to read and receive info . “God cannot alter the past, but historians can.” by Samuel Butler.
Appreciate it for helping out, wonderful info .
Very interesting topic, regards for putting up.
Normally I don’t learn article on blogs, but I wish to say that this write-up very pressured me to take a look at and do it! Your writing style has been surprised me. Thank you, quite nice article.
Today, while I was at work, my cousin stole my iPad and tested to see if it can survive a thirty foot drop, just so she can be a youtube sensation. My apple ipad is now broken and she has 83 views. I know this is totally off topic but I had to share it with someone!
Undeniably imagine that which you said. Your favorite justification appeared to be at the web the simplest factor to remember of. I say to you, I certainly get irked while other folks consider worries that they plainly don’t know about. You managed to hit the nail upon the highest and outlined out the entire thing without having side-effects , other people could take a signal. Will probably be again to get more. Thanks
This is really attention-grabbing, You’re an overly professional blogger. I’ve joined your feed and stay up for seeking extra of your excellent post. Also, I have shared your website in my social networks!
Someone essentially help to make seriously articles I would state. This is the very first time I frequented your website page and thus far? I amazed with the research you made to create this particular publish incredible. Fantastic job!
Yay google is my queen assisted me to find this great site! .
As a Newbie, I am continuously searching online for articles that can be of assistance to me. Thank you
whoah this weblog is great i really like studying your articles. Keep up the great work! You already know, many individuals are hunting round for this information, you could help them greatly.
I don’t unremarkably comment but I gotta tell thanks for the post on this one : D.
fantastic points altogether, you just received a brand new reader. What may you suggest in regards to your submit that you made some days in the past? Any certain?
I am impressed with this web site, real I am a fan.
It¦s really a great and useful piece of info. I am satisfied that you just shared this useful information with us. Please stay us up to date like this. Thank you for sharing.
You could certainly see your skills within the paintings you write. The sector hopes for even more passionate writers such as you who are not afraid to mention how they believe. At all times go after your heart. “If you feel yourself falling, let go and glide.” by Steffen Francisco.
I have learn some just right stuff here. Definitely worth bookmarking for revisiting. I wonder how a lot attempt you set to make this sort of excellent informative website.
Adorei este site. Para saber mais detalhes acesse nosso site e descubra mais. Todas as informações contidas são conteúdos relevantes e únicos. Tudo que você precisa saber está ta lá.
Hi my loved one! I want to say that this article is amazing, great written and come with approximately all vital infos. I would like to look extra posts like this.
There is noticeably a bundle to know about this. I assume you made certain good factors in features also.
Thanks for some other informative web site. Where else could I am getting that type of information written in such a perfect manner? I have a challenge that I am just now running on, and I’ve been on the glance out for such info.
F*ckin¦ tremendous things here. I¦m very glad to look your article. Thank you a lot and i am having a look ahead to contact you. Will you kindly drop me a e-mail?
Sweet web site, super design and style, really clean and apply genial.
I was very happy to search out this net-site.I wanted to thanks on your time for this glorious learn!! I definitely having fun with each little little bit of it and I’ve you bookmarked to take a look at new stuff you weblog post.
Hey, you used to write magnificent, but the last several posts have been kinda boring… I miss your great writings. Past several posts are just a little out of track! come on!
I believe that is among the such a lot important information for me. And i am glad studying your article. But want to remark on few general issues, The site taste is perfect, the articles is actually excellent : D. Good process, cheers
Hello, i believe that i saw you visited my site thus i came to “go back the want”.I’m attempting to in finding issues to enhance my website!I guess its good enough to make use of a few of your ideas!!
What i do not understood is in reality how you are not really much more well-preferred than you might be now. You are so intelligent. You understand therefore significantly when it comes to this subject, made me in my view consider it from a lot of various angles. Its like women and men are not interested until it?¦s one thing to accomplish with Lady gaga! Your individual stuffs outstanding. All the time take care of it up!
I’ll immediately grab your rss feed as I can not find your e-mail subscription link or e-newsletter service. Do you have any? Please let me know so that I could subscribe. Thanks.
Have you ever thought about creating an e-book or guest authoring on other sites? I have a blog centered on the same topics you discuss and would really like to have you share some stories/information. I know my audience would appreciate your work. If you’re even remotely interested, feel free to send me an email.
I really enjoy looking at on this internet site, it has fantastic articles. “And all the winds go sighing, For sweet things dying.” by Christina Georgina Rossetti.
I have been checking out many of your articles and it’s pretty clever stuff. I will make sure to bookmark your site.
Thank you for sharing excellent informations. Your web-site is very cool. I’m impressed by the details that you’ve on this site. It reveals how nicely you understand this subject. Bookmarked this web page, will come back for more articles. You, my pal, ROCK! I found just the information I already searched everywhere and simply couldn’t come across. What a perfect web-site.
Hello there, I discovered your site by means of Google at the same time as looking for a comparable topic, your site came up, it seems to be great. I have bookmarked it in my google bookmarks.
I like this blog so much, saved to favorites.
Hey, you used to write magnificent, but the last several posts have been kinda boring… I miss your great writings. Past several posts are just a little out of track! come on!
Perfect work you have done, this site is really cool with excellent info .
Merely a smiling visitant here to share the love (:, btw great style.
There are actually plenty of details like that to take into consideration. That could be a nice point to carry up. I supply the ideas above as common inspiration but clearly there are questions like the one you carry up where a very powerful factor will probably be working in trustworthy good faith. I don?t know if finest practices have emerged around issues like that, but I am certain that your job is clearly identified as a fair game. Both boys and girls feel the impression of only a second’s pleasure, for the remainder of their lives.
I dugg some of you post as I cogitated they were handy very helpful
You completed several good points there. I did a search on the matter and found a good number of folks will agree with your blog.
Great line up. We will be linking to this great article on our site. Keep up the good writing.
The next time I learn a blog, I hope that it doesnt disappoint me as a lot as this one. I imply, I do know it was my option to learn, but I actually thought youd have something interesting to say. All I hear is a bunch of whining about one thing that you can fix should you werent too busy searching for attention.
Really fantastic info can be found on weblog. “I believe in nothing, everything is sacred. I believe in everything, nothing is sacred.” by Tom Robbins.
Pretty! This was a really wonderful post. Thank you for your provided information.
Thanks for all your efforts that you have put in this. very interesting info .
Thanx for the effort, keep up the good work Great work, I am going to start a small Blog Engine course work using your site I hope you enjoy blogging with the popular BlogEngine.net.Thethoughts you express are really awesome. Hope you will right some more posts.
I consider something truly interesting about your weblog so I saved to bookmarks.
I’m not that much of a online reader to be honest but your blogs really nice, keep it up! I’ll go ahead and bookmark your site to come back down the road. All the best
Heya i am for the first time here. I came across this board and I find It really useful & it helped me out a lot. I hope to give something back and help others like you aided me.
This actually answered my downside, thank you!
A large percentage of of the things you state happens to be supprisingly precise and it makes me wonder why I had not looked at this with this light before. Your article really did turn the light on for me personally as far as this specific subject matter goes. Nonetheless there is actually one issue I am not really too comfy with so whilst I attempt to reconcile that with the actual main idea of your issue, permit me see what the rest of the visitors have to point out.Nicely done.
Hello There. I discovered your blog the use of msn. This is a very well written article. I’ll make sure to bookmark it and come back to read more of your useful information. Thanks for the post. I will certainly return.
Gracias por compartir esta información de gran utilidad. Suerte y saludos desde nuestro portal de Euromillones
Heya this is kind of of off topic but I was wondering if blogs use WYSIWYG editors or if you have to manually code with HTML. I’m starting a blog soon but have no coding experience so I wanted to get guidance from someone with experience. Any help would be greatly appreciated!
I truly appreciate this post. I have been looking everywhere for this! Thank goodness I found it on Bing. You have made my day! Thx again
Good info. Lucky me I reach on your website by accident, I bookmarked it.
Hey! Do you know if they make any plugins to safeguard against hackers? I’m kinda paranoid about losing everything I’ve worked hard on. Any suggestions?
There is noticeably a bundle to know about this. I assume you made certain nice points in features also.
We are a group of volunteers and starting a new scheme in our community. Your website offered us with valuable information to work on. You’ve done a formidable job and our entire community will be thankful to you.
Hi my friend! I want to say that this article is amazing, great written and come with almost all important infos. I would like to see more posts like this .
Hello! I just would like to give a huge thumbs up for the great info you have here on this post. I will be coming back to your blog for more soon.
Keep up the great piece of work, I read few posts on this site and I believe that your web site is very interesting and has got sets of good info .
Can I just say what a relief to find someone who actually knows what theyre talking about on the internet. You definitely know how to bring an issue to light and make it important. More people need to read this and understand this side of the story. I cant believe youre not more popular because you definitely have the gift.
Thanks a bunch for sharing this with all of us you actually know what you’re talking about! Bookmarked. Please also visit my web site =). We could have a link exchange agreement between us!
The subsequent time I read a blog, I hope that it doesnt disappoint me as much as this one. I mean, I know it was my option to read, however I really thought youd have one thing interesting to say. All I hear is a bunch of whining about something that you may fix for those who werent too busy searching for attention.
I simply couldn’t go away your website prior to suggesting that I extremely loved the usual information a person provide for your visitors? Is going to be again often in order to check out new posts
It¦s really a great and helpful piece of information. I am happy that you shared this useful information with us. Please keep us informed like this. Thanks for sharing.
Only wanna comment that you have a very nice internet site, I love the layout it actually stands out.
Do you have a spam problem on this blog; I also am a blogger, and I was wondering your situation; we have created some nice practices and we are looking to swap methods with others, please shoot me an e-mail if interested.
I have been surfing online greater than 3 hours these days, yet I by no means discovered any fascinating article like yours. It is lovely worth enough for me. In my opinion, if all webmasters and bloggers made just right content as you probably did, the web might be much more helpful than ever before. “Learn to see in another’s calamity the ills which you should avoid.” by Publilius Syrus.
This is a very good tips especially to those new to blogosphere, brief and accurate information… Thanks for sharing this one. A must read article.
I have not checked in here for some time because I thought it was getting boring, but the last several posts are great quality so I guess I¦ll add you back to my daily bloglist. You deserve it my friend 🙂
hi!,I like your writing so much! share we communicate more about your post on AOL? I require an expert on this area to solve my problem. Maybe that’s you! Looking forward to see you.
Very clear site, regards for this post.
I real delighted to find this internet site on bing, just what I was looking for : D as well bookmarked.
Hello my friend! I want to say that this post is awesome, nice written and come with approximately all vital infos. I¦d like to see more posts like this .
I do love the way you have framed this matter and it really does supply me a lot of fodder for thought. Nevertheless, from everything that I have witnessed, I simply wish when the remarks stack on that people today continue to be on point and don’t get started upon a tirade of some other news of the day. All the same, thank you for this excellent piece and even though I can not concur with this in totality, I regard the viewpoint.
This is a very good tips especially to those new to blogosphere, brief and accurate information… Thanks for sharing this one. A must read article.
Hi there, I found your web site via Google while searching for a related topic, your web site came up, it looks great. I’ve bookmarked it in my google bookmarks.
Valuable info. Lucky me I found your website by accident, and I am shocked why this accident didn’t happened earlier! I bookmarked it.
I don’t normally comment but I gotta state thankyou for the post on this perfect one : D.
F*ckin’ amazing things here. I’m very glad to see your post. Thanks a lot and i am looking forward to contact you. Will you kindly drop me a mail?
I enjoy you because of all of the efforts on this web site. My aunt delights in going through investigation and it’s really easy to see why. We all notice all regarding the lively mode you deliver valuable guidance via the website and in addition encourage contribution from the others on the matter and our own simple princess is understanding so much. Have fun with the rest of the new year. You are carrying out a dazzling job.
Hey there just wanted to give you a quick heads up and let you know a few of the images aren’t loading correctly. I’m not sure why but I think its a linking issue. I’ve tried it in two different internet browsers and both show the same results.
This is a topic close to my heart cheers, where are your contact details though?
It’s truly a nice and useful piece of info. I’m glad that you shared this useful information with us. Please keep us informed like this. Thanks for sharing.
It’s actually a great and helpful piece of information. I’m happy that you just shared this helpful information with us. Please keep us up to date like this. Thanks for sharing.
Hi there! I could have sworn I’ve been to this website before but after browsing through some of the post I realized it’s new to me. Anyways, I’m definitely delighted I found it and I’ll be bookmarking and checking back often!
I like what you guys are up too. Such clever work and reporting! Carry on the excellent works guys I¦ve incorporated you guys to my blogroll. I think it’ll improve the value of my web site 🙂
very nice submit, i definitely love this web site, carry on it
You are my inhalation, I possess few web logs and occasionally run out from post :). “Yet do I fear thy nature It is too full o’ the milk of human kindness.” by William Shakespeare.
I’ve been surfing online more than 3 hours today, yet I never found any interesting article like yours. It’s pretty worth enough for me. In my opinion, if all site owners and bloggers made good content as you did, the net will be a lot more useful than ever before.
I know this if off topic but I’m looking into starting my own blog and was curious what all is required to get set up? I’m assuming having a blog like yours would cost a pretty penny? I’m not very internet savvy so I’m not 100 certain. Any tips or advice would be greatly appreciated. Many thanks
We are a group of volunteers and starting a new scheme in our community. Your site offered us with valuable information to work on. You’ve done a formidable job and our whole community will be thankful to you.
Magnificent site. A lot of helpful info here. I am sending it to some buddies ans also sharing in delicious. And certainly, thank you to your sweat!
Outstanding post, you have pointed out some fantastic details , I likewise think this s a very good website.
I am not very excellent with English but I find this very easygoing to translate.
I know this if off topic but I’m looking into starting my own weblog and was wondering what all is needed to get setup? I’m assuming having a blog like yours would cost a pretty penny? I’m not very web savvy so I’m not 100 sure. Any recommendations or advice would be greatly appreciated. Thanks
As I website possessor I believe the subject material here is very superb, regards for your efforts.
Your place is valueble for me. Thanks!…
It’s onerous to seek out knowledgeable folks on this matter, but you sound like you recognize what you’re speaking about! Thanks
I like this website so much, saved to fav. “I don’t care what is written about me so long as it isn’t true.” by Dorothy Parker.
We absolutely love your blog and find most of your post’s to be what precisely I’m looking for. Do you offer guest writers to write content for yourself? I wouldn’t mind producing a post or elaborating on a lot of the subjects you write related to here. Again, awesome blog!
I relish, cause I found exactly what I used to be looking for. You’ve ended my four day long hunt! God Bless you man. Have a nice day. Bye
I’ve been browsing online more than 3 hours today, but I never found any interesting article like yours. It?¦s lovely price sufficient for me. Personally, if all site owners and bloggers made good content as you did, the web will likely be much more useful than ever before.
Well I sincerely enjoyed studying it. This information offered by you is very constructive for good planning.
I like this weblog its a master peace ! Glad I noticed this on google .
I have been absent for some time, but now I remember why I used to love this website. Thanks , I will try and check back more often. How frequently you update your web site?
F*ckin’ tremendous issues here. I’m very glad to see your post. Thanks so much and i’m looking forward to contact you. Will you kindly drop me a mail?
I was wondering if you ever considered changing the structure of your site? Its very well written; I love what youve got to say. But maybe you could a little more in the way of content so people could connect with it better. Youve got an awful lot of text for only having one or two pictures. Maybe you could space it out better?
I’m really impressed together with your writing talents and also with the layout in your weblog. Is this a paid theme or did you modify it your self? Either way stay up the excellent quality writing, it’s rare to look a nice weblog like this one today..
Great write-up, I?¦m normal visitor of one?¦s website, maintain up the excellent operate, and It is going to be a regular visitor for a long time.
Regards for this post, I am a big big fan of this site would like to go along updated.
I was recommended this website via my cousin. I’m no longer sure whether or not this put up is written by him as no one else know such certain about my problem. You’re wonderful! Thanks!
I was examining some of your content on this internet site and I think this web site is very informative! Keep posting.
Great wordpress blog here.. It’s hard to find quality writing like yours these days. I really appreciate people like you! take care
I would like to thnkx for the efforts you have put in writing this site. I am hoping the same high-grade website post from you in the upcoming also. In fact your creative writing skills has encouraged me to get my own web site now. Actually the blogging is spreading its wings fast. Your write up is a great example of it.
Hey there! I know this is somewhat off topic but I was wondering if you knew where I could locate a captcha plugin for my comment form? I’m using the same blog platform as yours and I’m having problems finding one? Thanks a lot!
Hello very nice site!! Guy .. Excellent .. Amazing .. I will bookmark your blog and take the feeds additionallyKI’m glad to seek out a lot of helpful info here in the post, we need develop extra techniques in this regard, thanks for sharing. . . . . .
I regard something genuinely special in this site.
I visited a lot of website but I think this one holds something special in it in it
My partner and I absolutely love your blog and find nearly all of your post’s to be just what I’m looking for. Do you offer guest writers to write content for yourself? I wouldn’t mind composing a post or elaborating on some of the subjects you write with regards to here. Again, awesome web site!
Only a smiling visitant here to share the love (:, btw great design and style.
I have read some good stuff here. Definitely value bookmarking for revisiting. I surprise how much effort you place to create such a magnificent informative site.
Good day! This is my first comment here so I just wanted to give a quick shout out and say I truly enjoy reading through your blog posts. Can you recommend any other blogs/websites/forums that go over the same topics? Many thanks!
I like this website very much, Its a really nice office to read and obtain information.
Hi there! Do you know if they make any plugins to assist with Search Engine Optimization? I’m trying to get my blog to rank for some targeted keywords but I’m not seeing very good success. If you know of any please share. Appreciate it!
I couldn’t resist commenting
Hi my friend! I want to say that this article is awesome, nice written and include approximately all significant infos. I’d like to see more posts like this.
Great post, you have pointed out some fantastic points, I likewise believe this s a very great website.
You really make it seem really easy together with your presentation however I to find this topic to be actually one thing that I believe I’d never understand. It seems too complicated and extremely extensive for me. I am having a look forward on your subsequent publish, I¦ll try to get the hang of it!
You should participate in a contest for top-of-the-line blogs on the web. I will advocate this site!
Some truly fantastic articles on this website , appreciate it for contribution.
I truly appreciate this post. I have been looking all over for this! Thank goodness I found it on Bing. You’ve made my day! Thank you again
Great line up. We will be linking to this great article on our site. Keep up the good writing.
The other day, while I was at work, my sister stole my iphone and tested to see if it can survive a forty foot drop, just so she can be a youtube sensation. My apple ipad is now broken and she has 83 views. I know this is totally off topic but I had to share it with someone!
I genuinely enjoy examining on this site, it holds wonderful content. “I have a new philosophy. I’m only going to dread one day at a time.” by Charles M. Schulz.
Hello, you used to write wonderful, but the last several posts have been kinda boring?K I miss your tremendous writings. Past several posts are just a little out of track! come on!
But wanna comment that you have a very decent website , I enjoy the design and style it really stands out.
Very great post. I simply stumbled upon your weblog and wished to say that I’ve truly loved browsing your weblog posts. In any case I’ll be subscribing on your rss feed and I am hoping you write once more soon!
It’s onerous to find educated people on this topic, however you sound like you realize what you’re talking about! Thanks
wonderful points altogether, you simply gained a brand new reader. What would you suggest about your post that you made a few days ago? Any positive?
Very good written post. It will be supportive to everyone who utilizes it, as well as yours truly :). Keep up the good work – for sure i will check out more posts.
Very nice style and design and good written content, very little else we need : D.
I believe you have noted some very interesting details , appreciate it for the post.
Way cool, some valid points! I appreciate you making this article available, the rest of the site is also high quality. Have a fun.
It¦s actually a nice and helpful piece of information. I am glad that you shared this helpful information with us. Please keep us up to date like this. Thanks for sharing.
I delight in, lead to I discovered exactly what I was taking a look for. You have ended my four day lengthy hunt! God Bless you man. Have a great day. Bye
Hi, Neat post. There’s a problem with your website in internet explorer, would test this… IE still is the market leader and a large portion of people will miss your great writing due to this problem.
Nice read, I just passed this onto a friend who was doing some research on that. And he actually bought me lunch as I found it for him smile So let me rephrase that: Thank you for lunch! “Curiosity will conquer fear even more than bravery will.” by James Stephens.
Hey there! Someone in my Facebook group shared this website with us so I came to check it out. I’m definitely loving the information. I’m book-marking and will be tweeting this to my followers! Exceptional blog and great design.
certainly like your website but you have to test the spelling on quite a few of your posts. Several of them are rife with spelling issues and I in finding it very troublesome to inform the truth on the other hand I will surely come again again.
This is really interesting, You’re a very skilled blogger. I’ve joined your feed and look forward to seeking more of your fantastic post. Also, I’ve shared your site in my social networks!
Do you mind if I quote a couple of your articles as long as I provide credit and sources back to your website? My blog is in the exact same area of interest as yours and my visitors would genuinely benefit from a lot of the information you present here. Please let me know if this okay with you. Cheers!
I haven’t checked in here for a while because I thought it was getting boring, but the last few posts are great quality so I guess I’ll add you back to my daily bloglist. You deserve it my friend 🙂
Thank you for another wonderful article. The place else may just anybody get that type of information in such an ideal approach of writing? I’ve a presentation next week, and I am at the look for such information.
I believe you have noted some very interesting points, thankyou for the post.
The root of your writing whilst appearing agreeable originally, did not really work well with me personally after some time. Somewhere throughout the sentences you actually managed to make me a believer but just for a short while. I nevertheless have got a problem with your jumps in logic and you would do well to fill in those gaps. If you actually can accomplish that, I could undoubtedly end up being impressed.
Today, I went to the beachfront with my kids. I found a sea shell and gave it to my 4 year old daughter and said “You can hear the ocean if you put this to your ear.” She placed the shell to her ear and screamed. There was a hermit crab inside and it pinched her ear. She never wants to go back! LoL I know this is completely off topic but I had to tell someone!
I am no longer positive the place you’re getting your info, but great topic. I must spend a while studying much more or working out more. Thank you for excellent info I was looking for this information for my mission.
I?¦ve been exploring for a little bit for any high quality articles or weblog posts in this kind of house . Exploring in Yahoo I finally stumbled upon this web site. Reading this info So i?¦m satisfied to express that I have an incredibly just right uncanny feeling I discovered just what I needed. I so much surely will make sure to don?¦t fail to remember this website and give it a look regularly.
Thanks for some other magnificent article. Where else may anybody get that kind of information in such a perfect way of writing? I’ve a presentation next week, and I am at the search for such info.
You are my intake, I own few web logs and very sporadically run out from to post : (.
I¦ll right away seize your rss feed as I can not find your email subscription link or e-newsletter service. Do you have any? Please let me understand in order that I may subscribe. Thanks.
F*ckin’ remarkable things here. I am very glad to look your article. Thank you a lot and i’m taking a look forward to contact you. Will you please drop me a mail?
It is really a great and useful piece of info. I’m glad that you shared this useful information with us. Please keep us informed like this. Thank you for sharing.
I think other site proprietors should take this site as an model, very clean and great user friendly style and design, as well as the content. You are an expert in this topic!
Wow! Thank you! I constantly needed to write on my website something like that. Can I take a part of your post to my site?
As I website possessor I believe the written content here is real wonderful, thanks for your efforts.
I was looking at some of your articles on this website and I think this site is very instructive! Keep on posting.
Hi there! Someone in my Facebook group shared this site with us so I came to check it out. I’m definitely enjoying the information. I’m bookmarking and will be tweeting this to my followers! Superb blog and great design and style.
I’ve been absent for a while, but now I remember why I used to love this site. Thanks, I?¦ll try and check back more frequently. How frequently you update your website?
I am often to blogging and i really appreciate your content. The article has really peaks my interest. I am going to bookmark your site and keep checking for new information.
Hey, you used to write great, but the last several posts have been kinda boring… I miss your great writings. Past several posts are just a bit out of track! come on!
I am just commenting to let you know what a cool discovery our daughter had viewing your web site. She came to understand several pieces, most notably what it is like to possess a marvelous giving heart to get the rest without difficulty grasp specified complicated subject areas. You undoubtedly surpassed our own expectations. Thank you for rendering the effective, trusted, edifying and as well as unique tips on that topic to Emily.
I view something genuinely interesting about your web blog so I saved to my bookmarks.
Heya i am for the first time here. I found this board and I to find It really helpful & it helped me out a lot. I hope to offer one thing again and aid others like you aided me.
Great site. A lot of useful info here. I’m sending it to several friends ans also sharing in delicious. And certainly, thanks for your effort!
This is very interesting, You’re a very skilled blogger. I have joined your feed and look forward to seeking more of your excellent post. Also, I have shared your website in my social networks!
Aw, this was a very nice post. In concept I wish to put in writing like this moreover – taking time and actual effort to make a very good article… but what can I say… I procrastinate alot and under no circumstances seem to get one thing done.
There is evidently a bunch to know about this. I suppose you made some good points in features also.
Whats Taking place i’m new to this, I stumbled upon this I’ve discovered It positively useful and it has aided me out loads. I hope to give a contribution & help other customers like its helped me. Good job.
There are some fascinating closing dates in this article but I don’t know if I see all of them center to heart. There is some validity but I’ll take hold opinion until I look into it further. Good article , thanks and we would like more! Added to FeedBurner as well
When I initially commented I clicked the -Notify me when new feedback are added- checkbox and now each time a comment is added I get four emails with the identical comment. Is there any approach you possibly can take away me from that service? Thanks!
I think this web site holds some really good info for everyone :D. “A friend might well be reckoned the masterpiece of nature.” by Ralph Waldo Emerson.
Hello there! This is my first visit to your blog! We are a team of volunteers and starting a new initiative in a community in the same niche. Your blog provided us useful information to work on. You have done a outstanding job!
I think you have mentioned some very interesting points, appreciate it for the post.
I have been surfing on-line more than three hours nowadays, yet I by no means found any fascinating article like yours. It’s lovely price sufficient for me. Personally, if all website owners and bloggers made good content as you did, the internet will be a lot more useful than ever before.
I was just seeking this information for a while. After 6 hours of continuous Googleing, at last I got it in your web site. I wonder what’s the lack of Google strategy that do not rank this kind of informative sites in top of the list. Generally the top web sites are full of garbage.
Excellent goods from you, man. I have understand your stuff previous to and you are just too fantastic. I really like what you have acquired here, really like what you’re saying and the way in which you say it. You make it enjoyable and you still take care of to keep it wise. I can’t wait to read much more from you. This is really a terrific web site.
Everything is very open and very clear explanation of issues. was truly information. Your website is very useful. Thanks for sharing.
Precisely what I was looking for, thankyou for putting up.
Hi! This is my 1st comment here so I just wanted to give a quick shout out and tell you I genuinely enjoy reading through your articles. Can you suggest any other blogs/websites/forums that deal with the same subjects? Thanks!
Thanks for another wonderful article. The place else may just anyone get that kind of information in such a perfect method of writing? I have a presentation subsequent week, and I’m on the search for such information.
I think that is among the most important information for me. And i’m glad reading your article. But wanna commentary on some basic issues, The web site style is wonderful, the articles is in reality excellent : D. Good activity, cheers
It¦s in reality a great and useful piece of information. I am glad that you shared this helpful info with us. Please keep us informed like this. Thanks for sharing.
I am continuously searching online for ideas that can assist me. Thx!
Very interesting details you have noted, thanks for posting.
wonderful points altogether, you just gained a brand new reader. What would you recommend in regards to your post that you made a few days ago? Any positive?
Hi there, just became aware of your blog through Google, and found that it is really informative. I am gonna watch out for brussels. I will appreciate if you continue this in future. A lot of people will be benefited from your writing. Cheers!
Thankyou for helping out, good information.
I couldn’t resist commenting
hello!,I really like your writing so much! proportion we keep up a correspondence extra about your article on AOL? I require an expert on this area to unravel my problem. May be that’s you! Looking forward to look you.
hello!,I like your writing so much! proportion we communicate extra about your post on AOL? I need an expert on this area to resolve my problem. Maybe that is you! Taking a look ahead to look you.
Hi, just required you to know I he added your site to my Google bookmarks due to your layout. But seriously, I believe your internet site has 1 in the freshest theme I??ve came across. It extremely helps make reading your blog significantly easier.
Some genuinely terrific work on behalf of the owner of this internet site, dead great content.
Thanks a lot for sharing this with all of us you actually know what you’re talking about! Bookmarked. Kindly also visit my website =). We could have a link exchange agreement between us!
whoah this blog is wonderful i love reading your articles. Keep up the good work! You know, lots of people are searching around for this information, you could help them greatly.
It is really a great and helpful piece of information. I am glad that you shared this helpful information with us. Please keep us up to date like this. Thanks for sharing.
It is truly a nice and useful piece of information. I am happy that you simply shared this helpful information with us. Please keep us informed like this. Thank you for sharing.
Great blog! I am loving it!! Will be back later to read some more. I am taking your feeds also
As soon as I detected this web site I went on reddit to share some of the love with them.
I love foregathering utile info, this post has got me even more info! .
Thanks for sharing excellent informations. Your web-site is so cool. I am impressed by the details that you¦ve on this web site. It reveals how nicely you understand this subject. Bookmarked this web page, will come back for extra articles. You, my pal, ROCK! I found simply the information I already searched all over the place and simply could not come across. What a perfect web site.
you are in reality a just right webmaster. The web site loading velocity is amazing. It kind of feels that you’re doing any unique trick. In addition, The contents are masterpiece. you’ve done a fantastic process in this subject!