Let’s Install:
X-Axis Belt for the MakerBot Rep 2
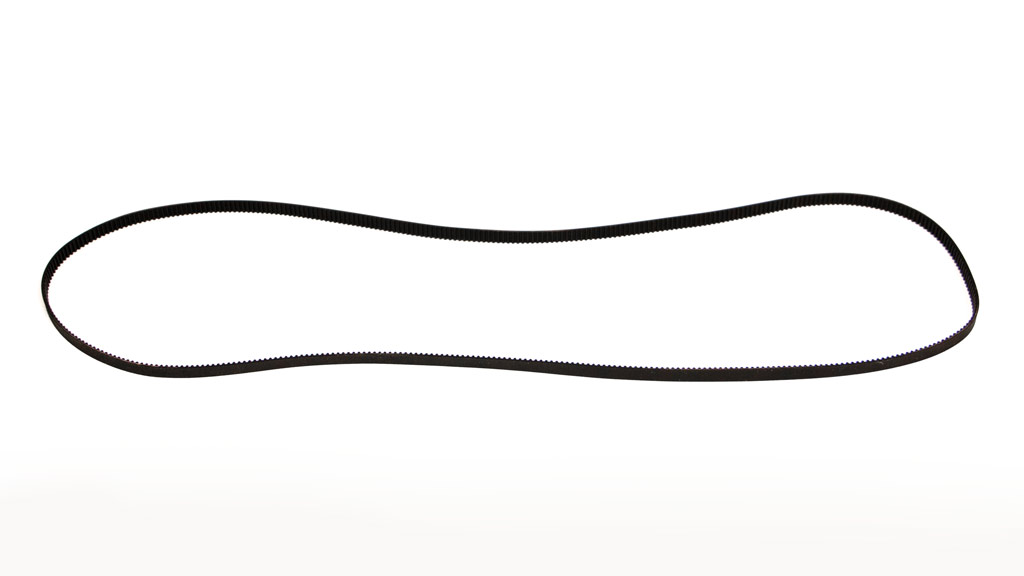
You’ve received your new replacement MakerBot X-Axis Belt from Fargo 3D Printing and are wondering how to install it. Watch the video tutorial below or follow along with the written directions.
As always, turn off and unplug your machine before doing any repair work.
- 5mm hex key
- 2.5mm hex key
- Grease Syringe
- New X-Axis Belt
2
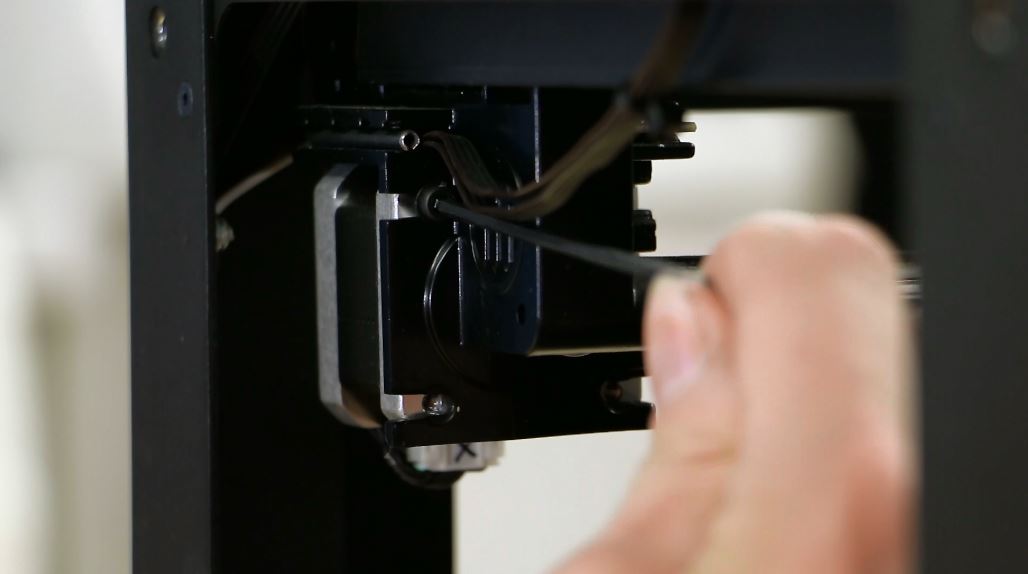
Remove the right axis motor.
- Remove all four screws of the right axis motor. Don’t lose the small washers.
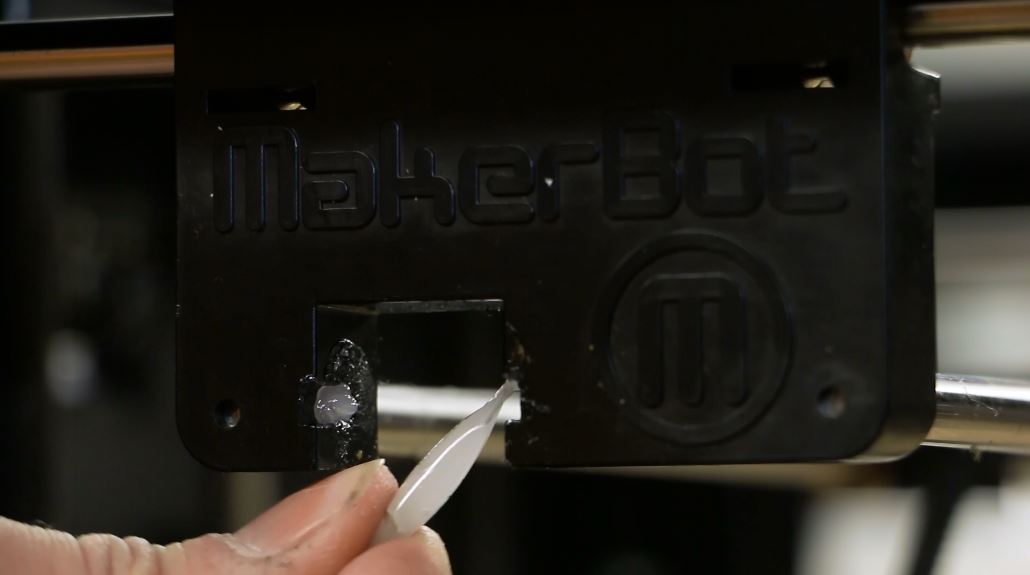
- Pop out the metal pin in the upper left corner.
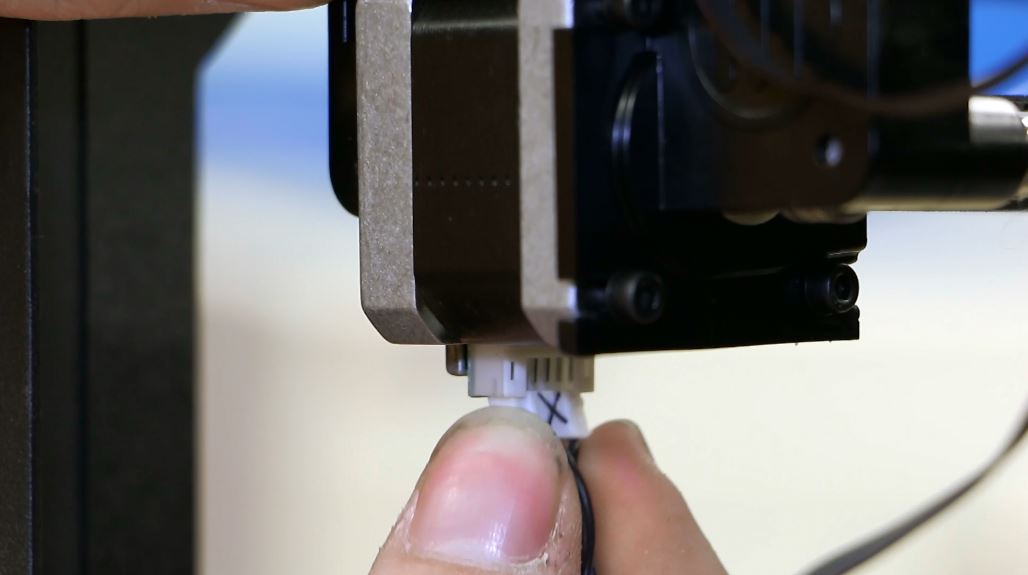
- Unplug the motor and move the wires away.
- Remove the motor from the right axis wing.
4
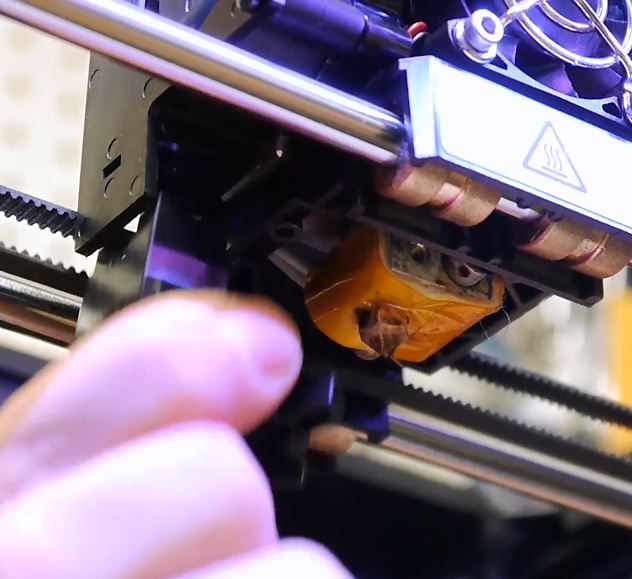
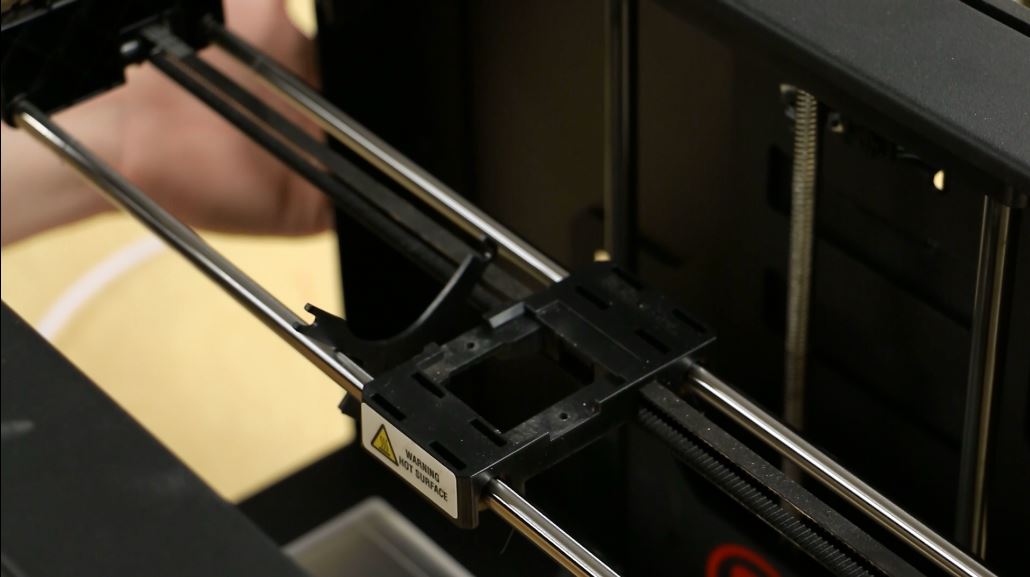
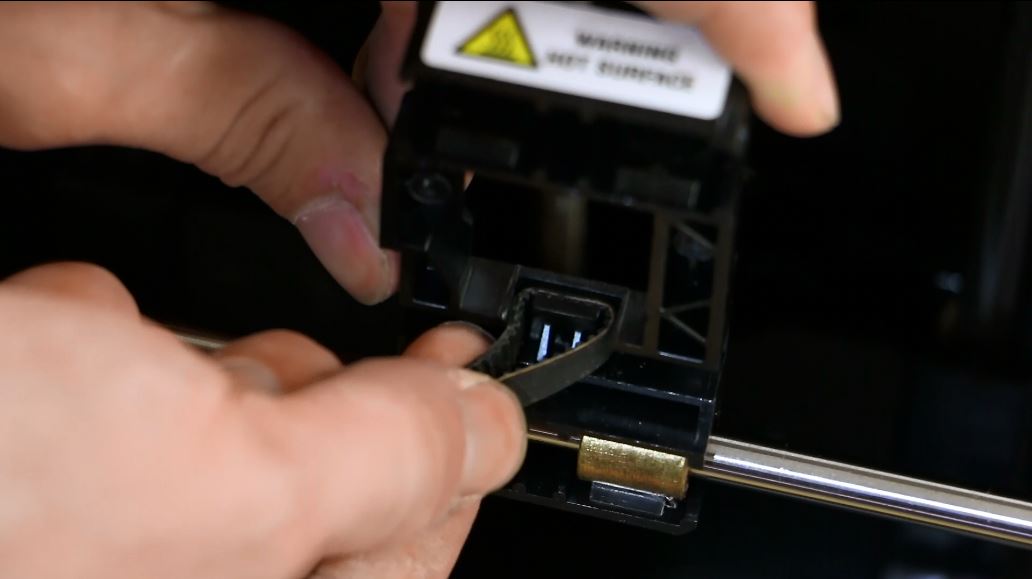
Remove the belt from the carriage.
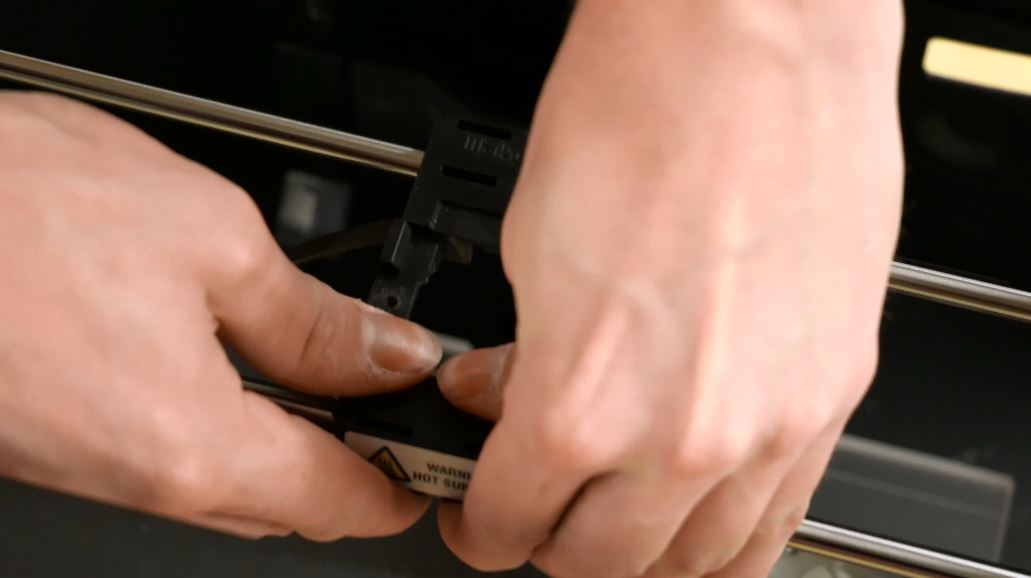
- Grasp the front of the carriage and pull up until you hear a click.
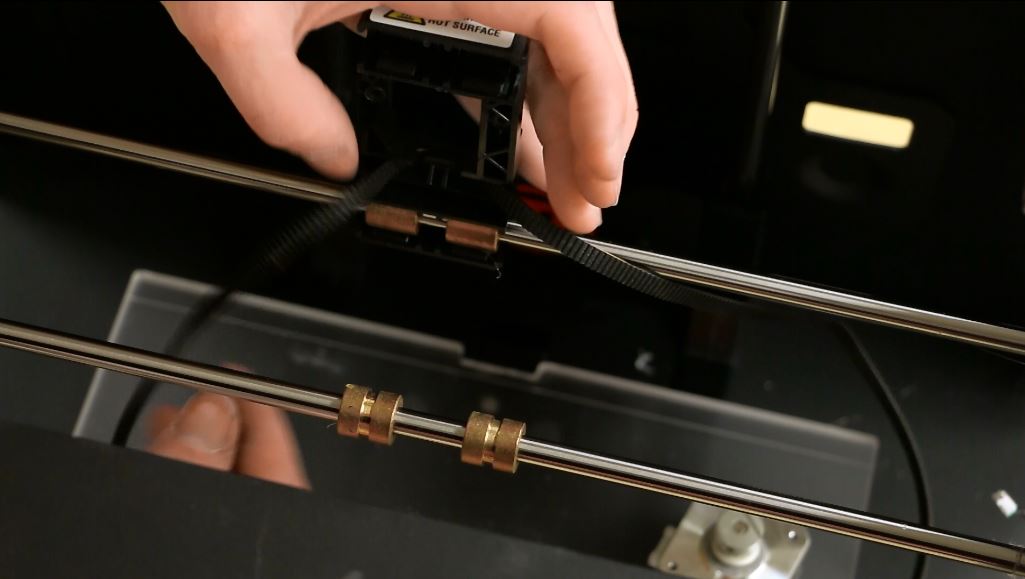
- Hold the carriage straight up from the rod to which it is still connected.
- Slide the belt up and out.
6
Attach the new belt to the pulleys on the ends of the axis.
- Move to the Y-axis secondary again and grease where you will re-insert the plastic idler pulley.
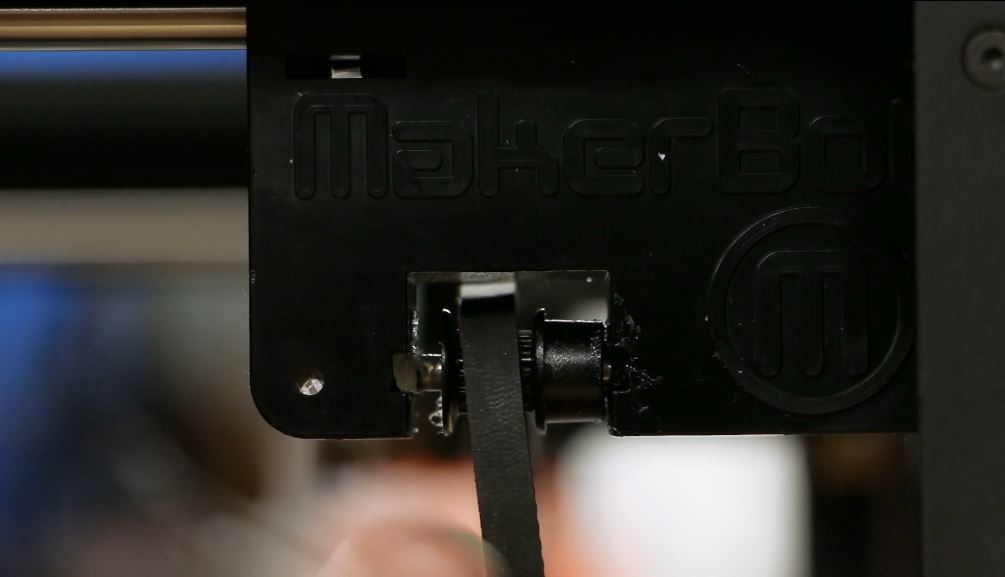
- Grab the idler pulley and loop the belt over it. The thicker part of the pulley needs to be facing the front of the machine.
- Next, move to the right side of the machine so you are standing behind it. Grab the motor so the connector faces down.
- Loop the belt over its drive gear. Push into position.
7
Reinstall the X-Axis motor.
- Continue putting pressure on the motor, holding it in place with the belt taut, while screwing it in, left side first.
- Seat the white motor cable back into it’s connector.
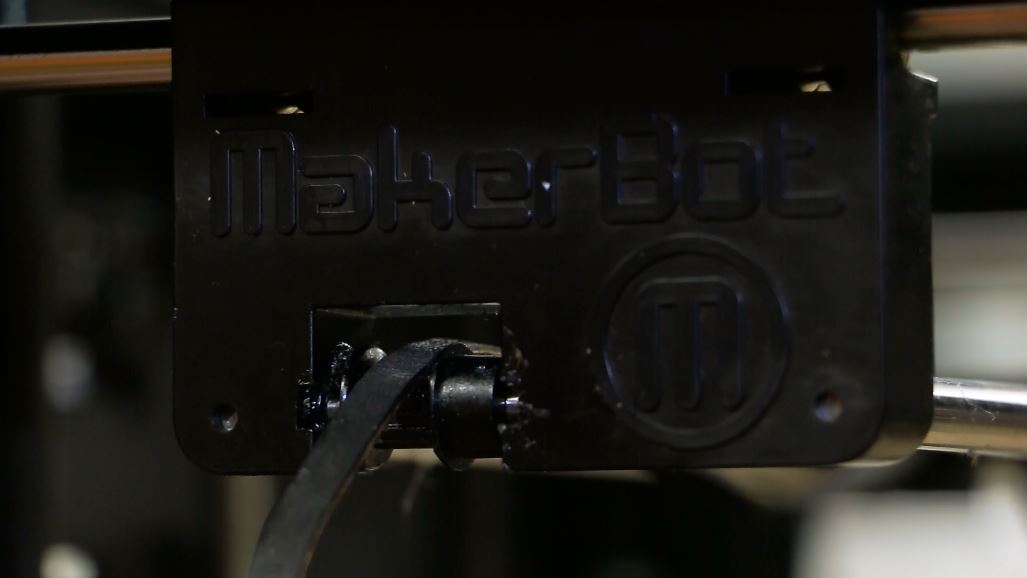
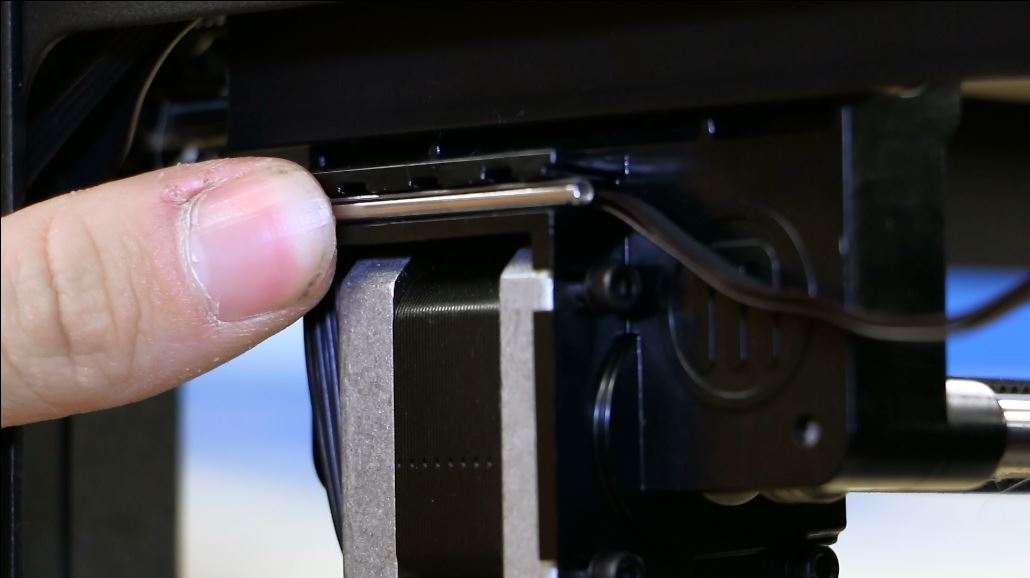
- Loop the cables back into the slot above the motor, secure with the metal pin.
- Don’t push the pin too far in so as to damage the wires. Make sure the metal pin is flush to the outside surface of the slot.

I’d have to examine with you here. Which is not one thing I usually do! I take pleasure in reading a post that may make folks think. Additionally, thanks for permitting me to comment!
Very interesting points you have noted, thankyou for posting.
You completed a number of good points there. I did a search on the issue and found a good number of folks will have the same opinion with your blog.
I like this internet site because so much useful stuff on here : D.
This blog is definitely rather handy since I’m at the moment creating an internet floral website – although I am only starting out therefore it’s really fairly small, nothing like this site. Can link to a few of the posts here as they are quite. Thanks much. Zoey Olsen
Great – I should definitely pronounce, impressed with your web site. I had no trouble navigating through all the tabs as well as related information ended up being truly simple to do to access. I recently found what I hoped for before you know it in the least. Quite unusual. Is likely to appreciate it for those who add forums or anything, website theme . a tones way for your client to communicate. Nice task..
Hi there, just became alert to your blog through Google, and found that it is really informative. I’m gonna watch out for brussels. I will appreciate if you continue this in future. Many people will be benefited from your writing. Cheers!
My programmer is trying to persuade me to move to .net from PHP. I have always disliked the idea because of the expenses. But he’s tryiong none the less. I’ve been using Movable-type on several websites for about a year and am worried about switching to another platform. I have heard excellent things about blogengine.net. Is there a way I can transfer all my wordpress posts into it? Any help would be greatly appreciated!
https://doxycycline.science/# doxycycline 100mg online
When I originally commented I clicked the -Notify me when new comments are added- checkbox and now each time a comment is added I get four emails with the same comment. Is there any way you can remove me from that service? Thanks!
good post.Ne’er knew this, thankyou for letting me know.
Some really wonderful posts on this internet site, appreciate it for contribution. “Be absolutely determined to enjoy what you do.” by Sarah Knowles Bolton.
Hi my friend! I wish to say that this article is awesome, great written and include approximately all vital infos. I would like to look extra posts like this .
What’s Taking place i am new to this, I stumbled upon this I have discovered It positively useful and it has helped me out loads. I’m hoping to give a contribution & help other customers like its helped me. Great job.
I have read several good stuff here. Definitely worth bookmarking for revisiting. I surprise how much effort you put to create such a excellent informative website.
What i don’t realize is actually how you’re now not really much more well-favored than you might be right now. You’re very intelligent. You realize therefore considerably in the case of this subject, made me for my part consider it from a lot of various angles. Its like women and men aren’t fascinated unless it’s one thing to accomplish with Woman gaga! Your individual stuffs nice. At all times take care of it up!
This is a topic close to my heart cheers, where are your contact details though?
ringworm treatment over the counter econazole nitrate cream over the counter
Some truly nice and useful info on this website, too I think the style and design contains excellent features.
I want studying and I believe this website got some genuinely useful stuff on it! .
best over the counter hair color over the counter hearing aids
Yesterday, while I was at work, my cousin stole my iPad and tested to see if it can survive a 30 foot drop, just so she can be a youtube sensation. My iPad is now broken and she has 83 views. I know this is completely off topic but I had to share it with someone!
Hi! I know this is kinda off topic but I was wondering if you knew where I could get a captcha plugin for my comment form? I’m using the same blog platform as yours and I’m having trouble finding one? Thanks a lot!
best over the counter toenail fungus medicine over the counter estrogen
over the counter antifungal cream strongest over the counter diuretic
Greetings from Colorado! I’m bored to tears at work so I decided to browse your site on my iphone during lunch break. I really like the information you provide here and can’t wait to take a look when I get home. I’m shocked at how fast your blog loaded on my phone .. I’m not even using WIFI, just 3G .. Anyhow, amazing site!
This really answered my problem, thank you!
https://over-the-counter-drug.com/# strongest over the counter muscle relaxer
best over the counter dark spot remover over the counter medicine
anti nausea medication over the counter over the counter eye drops for pink eye
You made some respectable points there. I regarded on the internet for the problem and located most people will go together with together with your website.
uti over the counter over the counter tapeworm treatment for dogs
Some really wondrous work on behalf of the owner of this web site, dead great subject matter.
Aw, this was a really nice post. In idea I want to put in writing like this moreover – taking time and precise effort to make a very good article… however what can I say… I procrastinate alot and by no means seem to get something done.
As I website possessor I believe the content material here is rattling wonderful , appreciate it for your hard work. You should keep it up forever! Good Luck.
I like this website because so much utile stuff on here : D.
https://drugsoverthecounter.com/# humana over the counter
I’ve been surfing online more than 3 hours today, yet I never found any fascinating article like yours. It’s lovely worth sufficient for me. Personally, if all web owners and bloggers made excellent content as you did, the internet might be much more helpful than ever before. “When you are content to be simply yourself and don’t compare or compete, everybody will respect you.” by Lao Tzu.
I’ve been exploring for a bit for any high-quality articles or weblog posts on this sort of area . Exploring in Yahoo I finally stumbled upon this web site. Reading this info So i’m glad to convey that I’ve an incredibly just right uncanny feeling I found out exactly what I needed. I such a lot indubitably will make sure to don’t disregard this web site and give it a glance on a relentless basis.
Thank you a bunch for sharing this with all of us you really understand what you are talking about! Bookmarked. Please additionally talk over with my web site =). We can have a hyperlink trade agreement among us!
I used to be suggested this website by my cousin. I’m not positive whether or not this submit is written by way of him as no one else realize such targeted about my trouble. You are wonderful! Thank you!
Very efficiently written information. It will be useful to anyone who utilizes it, including me. Keep doing what you are doing – can’r wait to read more posts.
Have you ever thought about including a little bit more than just your articles? I mean, what you say is fundamental and everything. Nevertheless think of if you added some great images or video clips to give your posts more, “pop”! Your content is excellent but with pics and clips, this site could certainly be one of the very best in its niche. Awesome blog!
I genuinely enjoy examining on this website, it holds great articles. “The living is a species of the dead and not a very attractive one.” by Friedrich Wilhelm Nietzsche.
Deference to article author, some superb information .
Hi my loved one! I want to say that this article is amazing, great written and include approximately all vital infos. I would like to peer extra posts like this .
I’ve been exploring for a little for any high quality articles or weblog posts in this kind of area . Exploring in Yahoo I ultimately stumbled upon this site. Reading this info So i am glad to convey that I’ve an incredibly just right uncanny feeling I found out just what I needed. I most without a doubt will make certain to do not disregard this website and provides it a glance on a relentless basis.
Great blog right here! Also your web site lots up fast! What web host are you the usage of? Can I am getting your affiliate link for your host? I want my site loaded up as fast as yours lol
I loved as much as you’ll receive carried out right here. The sketch is tasteful, your authored subject matter stylish. nonetheless, you command get bought an nervousness over that you wish be delivering the following. unwell unquestionably come further formerly again since exactly the same nearly very often inside case you shield this increase.
Hi there! This post couldn’t be written any better! Reading through this post reminds me of my previous room mate! He always kept talking about this. I will forward this article to him. Pretty sure he will have a good read. Thank you for sharing!
I genuinely appreciate your piece of work, Great post.
Real nice layout and excellent articles, nothing else we require : D.
A lot of blog writers nowadays yet just a few have blog posts worth spending time on reviewing.
My website: cartoon porn
It’s the best time to make some plans for the future and it’s time to be happy. I’ve read this post and if I could I desire to suggest you few interesting things or suggestions. Maybe you could write next articles referring to this article. I wish to read even more things about it!
I like this website so much, bookmarked. “Respect for the fragility and importance of an individual life is still the mark of an educated man.” by Norman Cousins.
Respect to post author, some fantastic information
My website: cartoon porn
It is actually a great and helpful piece of info. I?¦m glad that you simply shared this helpful info with us. Please keep us informed like this. Thank you for sharing.
You made some clear points there. I looked on the internet for the subject and found most individuals will approve with your website.
Just what I was searching for, appreciate it for posting.
As I website possessor I believe the content material here is rattling excellent , appreciate it for your efforts. You should keep it up forever! Good Luck.
I have been checking out many of your stories and it’s pretty nice stuff. I will make sure to bookmark your site.
We are a group of volunteers and starting a new scheme in our community. Your web site offered us with useful information to paintings on. You’ve performed an impressive job and our entire group might be grateful to you.
This really answered my problem, thanks!
I’ve read a few good stuff here. Definitely worth bookmarking for revisiting. I surprise how much effort you put to make such a excellent informative site.
Thank you for the auspicious writeup. It in fact was a amusement account it. Look advanced to more added agreeable from you! However, how could we communicate?
You have noted very interesting details! ps decent internet site.
I?¦ve been exploring for a little bit for any high quality articles or weblog posts in this kind of space . Exploring in Yahoo I finally stumbled upon this web site. Studying this information So i?¦m happy to exhibit that I have a very just right uncanny feeling I found out exactly what I needed. I such a lot without a doubt will make sure to don?¦t omit this web site and provides it a glance on a relentless basis.
This blog is definitely rather handy since I’m at the moment creating an internet floral website – although I am only starting out therefore it’s really fairly small, nothing like this site. Can link to a few of the posts here as they are quite. Thanks much. Zoey Olsen
Nice read, I just passed this onto a friend who was doing some research on that. And he actually bought me lunch because I found it for him smile So let me rephrase that: Thanks for lunch! “Feeling passionate about something is like getting a peak at your soul smiling back at you.” by Amanda Medinger.
I really like your writing style, wonderful info , thanks for putting up : D.
What i do not understood is if truth be told how you are no longer actually a lot more neatly-liked than you may be right now. You’re very intelligent. You understand therefore considerably on the subject of this subject, made me individually consider it from numerous numerous angles. Its like men and women are not involved unless it is something to do with Girl gaga! Your own stuffs excellent. At all times handle it up!
you have an incredible blog here! would you prefer to make some invite posts on my weblog?
Exactly what I was looking for, appreciate it for posting.
This is a topic close to my heart cheers, where are your contact details though?
Hello! I’ve been reading your blog for some time now and finally got the bravery to go ahead and give you a shout out from Kingwood Texas! Just wanted to mention keep up the great job!
Hi there, I found your site via Google while looking for a related topic, your website came up, it looks great. I have bookmarked it in my google bookmarks.
I am really enjoying the theme/design of your blog. Do you ever run into any web browser compatibility problems? A small number of my blog visitors have complained about my website not operating correctly in Explorer but looks great in Firefox. Do you have any recommendations to help fix this problem?
Some genuinely nice and utilitarian information on this website , as well I believe the design and style has superb features.
Hey just wanted to give you a quick heads up. The words in your article seem to be running off the screen in Ie. I’m not sure if this is a formatting issue or something to do with web browser compatibility but I thought I’d post to let you know. The layout look great though! Hope you get the problem resolved soon. Kudos
Was ich nicht verstand ist eigentlich, dass du nicht eigentlich viel beliebter bist als du im Moment. Du bist so intelligent. Sie wissen daher erheblich in Bezug auf dieses Thema, produziert, dass ich es persönlich aus so vielen verschiedenen Blickwinkeln betrachte. Es ist, als ob Männer und Frauen nicht fasziniert sind, es sei denn, es ist eine Sache, die man mit Lady Gaga tun kann! Deine eigenen Sachen herausragend. Halte es immer aufrecht!
Hi there! This post could not be written any better! Reading through this post reminds me of my good old room mate! He always kept chatting about this. I will forward this write-up to him. Fairly certain he will have a good read. Many thanks for sharing!
I went over this web site and I believe you have a lot of superb info, saved to fav (:.
Greetings! Very helpful advice on this article! It is the little changes that make the biggest changes. Thanks a lot for sharing!
Hi, I think your site might be having browser compatibility issues. When I look at your website in Safari, it looks fine but when opening in Internet Explorer, it has some overlapping. I just wanted to give you a quick heads up! Other then that, fantastic blog!
Wow! This could be one particular of the most beneficial blogs We have ever arrive across on this subject. Actually Wonderful. I’m also a specialist in this topic therefore I can understand your hard work.
As soon as I detected this site I went on reddit to share some of the love with them.
Hiya very cool site!! Guy .. Excellent .. Wonderful .. I’ll bookmark your web site and take the feeds also…I am glad to seek out a lot of useful info here in the post, we’d like work out more techniques in this regard, thank you for sharing. . . . . .
Thankyou for helping out, good info .
Real nice style and design and good written content, practically nothing else we want : D.
I just couldn’t depart your site before suggesting that I actually enjoyed the standard information a person provide for your visitors? Is going to be back often to check up on new posts
I’ve been absent for a while, but now I remember why I used to love this blog. Thanks, I will try and check back more frequently. How frequently you update your web site?
you’re in point of fact a just right webmaster. The website loading pace is incredible. It sort of feels that you’re doing any unique trick. Moreover, The contents are masterpiece. you’ve performed a magnificent activity in this matter!
There are certainly a variety of details like that to take into consideration. That may be a nice point to carry up. I provide the ideas above as basic inspiration however clearly there are questions just like the one you convey up the place an important thing will be working in sincere good faith. I don?t know if greatest practices have emerged round things like that, but I’m positive that your job is clearly recognized as a good game. Both boys and girls feel the impact of just a second’s pleasure, for the rest of their lives.
Magnificent site. A lot of useful info here. I am sending it to several friends ans also sharing in delicious. And of course, thanks for your effort!
You are a very intelligent person!
Real clean site, appreciate it for this post.
Hello very nice site!! Guy .. Excellent .. Amazing .. I’ll bookmark your blog and take the feeds also…I am happy to seek out numerous helpful information right here in the publish, we need work out extra techniques in this regard, thanks for sharing. . . . . .
Woah! I’m really enjoying the template/theme of this blog. It’s simple, yet effective. A lot of times it’s difficult to get that “perfect balance” between user friendliness and visual appeal. I must say that you’ve done a awesome job with this. Additionally, the blog loads super fast for me on Chrome. Outstanding Blog!
you’ve got a terrific blog right here! would you wish to make some invite posts on my blog?
I like what you guys are up too. Such clever work and reporting! Carry on the superb works guys I have incorporated you guys to my blogroll. I think it’ll improve the value of my web site 🙂
It’s really a nice and useful piece of info. I am satisfied that you shared this helpful information with us. Please stay us up to date like this. Thanks for sharing.
You actually make it appear really easy along with your presentation but I find this matter to be actually something which I feel I might by no means understand. It sort of feels too complicated and extremely extensive for me. I’m having a look ahead to your next post, I will try to get the grasp of it!
Hi! I’ve been reading your site for a long time now and finally got the courage to go ahead and give you a shout out from Humble Texas! Just wanted to mention keep up the excellent work!
Great beat ! I wish to apprentice at the same time as you amend your web site, how can i subscribe for a weblog site? The account helped me a applicable deal. I have been a little bit familiar of this your broadcast provided vibrant clear concept
Its like you read my mind! You appear to know a lot about this, like you wrote the book in it or something. I think that you can do with some pics to drive the message home a little bit, but instead of that, this is fantastic blog. An excellent read. I’ll certainly be back.
You made a few nice points there. I did a search on the topic and found a good number of people will agree with your blog.
Thanks for all of the work on this site. My daughter really loves working on investigation and it is easy to see why. Almost all know all concerning the lively method you give sensible items through the blog and as well foster response from other ones on that matter and my princess has been learning a lot of things. Have fun with the rest of the year. You’re carrying out a great job.
Hi! I know this is kinda off topic but I’d figured I’d ask. Would you be interested in exchanging links or maybe guest authoring a blog article or vice-versa? My site covers a lot of the same topics as yours and I think we could greatly benefit from each other. If you are interested feel free to send me an email. I look forward to hearing from you! Awesome blog by the way!
Hello! Someone in my Facebook group shared this website with us so I came to check it out. I’m definitely enjoying the information. I’m book-marking and will be tweeting this to my followers! Outstanding blog and great style and design.
I was examining some of your articles on this internet site and I conceive this internet site is rattling informative! Keep on putting up.
Hiya, I am really glad I have found this info. Nowadays bloggers publish only about gossips and net and this is actually frustrating. A good site with interesting content, this is what I need. Thanks for keeping this site, I will be visiting it. Do you do newsletters? Cant find it.
You have brought up a very wonderful details, appreciate it for the post.
I and my friends ended up reading the excellent techniques found on the blog and all of the sudden I had a terrible feeling I never expressed respect to the web blog owner for them. All of the ladies happened to be as a consequence thrilled to read all of them and now have quite simply been taking advantage of those things. Appreciation for genuinely quite helpful as well as for deciding on these kinds of high-quality topics most people are really desperate to be aware of. Our own sincere apologies for not expressing gratitude to earlier.
I’ve been browsing on-line more than 3 hours these days, but I by no means discovered any fascinating article like yours. It¦s pretty worth sufficient for me. Personally, if all website owners and bloggers made excellent content material as you did, the internet shall be much more helpful than ever before.
I’m not sure exactly why but this blog is loading extremely slow for me. Is anyone else having this issue or is it a problem on my end? I’ll check back later and see if the problem still exists.
This site definitely has all of the information I needed about this subject
My website: порно на дому
Thanks on your marvelous posting! I definitely enjoyed reading it, you happen to be a great author.I will make certain to bookmark your blog and will come back later in life. I want to encourage yourself to continue your great posts, have a nice evening!
We are a group of volunteers and starting a new scheme in our community. Your site offered us with valuable info to work on. You have done an impressive job and our entire community will be thankful to you.
As a Newbie, I am continuously exploring online for articles that can be of assistance to me.
My website: домашнее пооно
I like this site its a master peace ! Glad I noticed this on google .
Ponto IPTV a melhor programacao de canais IPTV do Brasil, filmes, series, futebol
My website: секс домашне
I believe that is one of the most important info for me. And i’m satisfied reading your article. However should commentary on few basic issues, The web site taste is great, the articles is truly nice : D. Just right process, cheers
Hey There. I found your blog the use of msn. This is a very smartly written article. I will be sure to bookmark it and return to learn extra of your useful information. Thanks for the post. I’ll definitely return.
Have you ever thought about publishing an e-book or guest authoring on other sites? I have a blog based on the same topics you discuss and would love to have you share some stories/information. I know my audience would appreciate your work. If you’re even remotely interested, feel free to shoot me an e-mail.
You could definitely see your expertise in the work you write. The world hopes for even more passionate writers like you who aren’t afraid to say how they believe. Always go after your heart.
Magnificent goods from you, man. I have understand your stuff previous to and you are just too great. I really like what you have acquired here, really like what you are stating and the way in which you say it. You make it entertaining and you still care for to keep it sensible. I can’t wait to read far more from you. This is really a great website.
After all, what a great site and informative posts, I will upload inbound link – bookmark this web site? Regards, Reader.
Good day! Do you know if they make any plugins to assist with SEO? I’m trying to get my blog to rank for some targeted keywords but I’m not seeing very good success. If you know of any please share. Appreciate it!
I really appreciate this post. I have been looking everywhere for this! Thank goodness I found it on Bing. You’ve made my day! Thx again!
Hi there, I found your web site via Google while looking for a comparable subject, your web site got here up, it seems to be great. I’ve bookmarked it in my google bookmarks.
Hello! I could have sworn I’ve been to this blog before but after browsing through some of the post I realized it’s new to me. Anyways, I’m definitely happy I found it and I’ll be book-marking and checking back frequently!
Very nice post. I just stumbled upon your weblog and wanted to say that I have truly enjoyed browsing your blog posts. In any case I’ll be subscribing to your feed and I hope you write again very soon!
magnificent post, very informative. I wonder why the other specialists of this sector do not notice this. You must continue your writing. I’m confident, you’ve a huge readers’ base already!
I was wondering if you ever considered changing the layout of your site? Its very well written; I love what youve got to say. But maybe you could a little more in the way of content so people could connect with it better. Youve got an awful lot of text for only having 1 or 2 images. Maybe you could space it out better?
F*ckin’ tremendous things here. I am very satisfied to peer your article. Thanks so much and i’m having a look forward to contact you. Will you please drop me a mail?
What i do not realize is if truth be told how you’re no longer really much more neatly-liked than you may be now. You’re very intelligent. You understand therefore significantly relating to this topic, produced me in my view imagine it from numerous various angles. Its like women and men aren’t involved unless it is one thing to do with Lady gaga! Your own stuffs nice. All the time maintain it up!
Regards for helping out, wonderful information.
Thanks for the sensible critique. Me and my neighbor were just preparing to do a little research about this. We got a grab a book from our local library but I think I learned more from this post. I am very glad to see such fantastic information being shared freely out there.
Very interesting topic, thanks for posting. “Nobody outside of a baby carriage or a judge’s chamber believes in an unprejudiced point of view.” by Lillian Hellman.
I’ll immediately grab your rss as I can not find your email subscription link or e-newsletter service. Do you’ve any? Kindly let me know in order that I could subscribe. Thanks.
Great write-up, I?¦m normal visitor of one?¦s web site, maintain up the nice operate, and It’s going to be a regular visitor for a long time.
I believe this web site contains some real superb information for everyone :D. “A friend might well be reckoned the masterpiece of nature.” by Ralph Waldo Emerson.
I haven’t checked in here for some time because I thought it was getting boring, but the last several posts are great quality so I guess I will add you back to my daily bloglist. You deserve it my friend 🙂
Thanks for every other informative blog. The place else may I am getting that type of info written in such an ideal approach? I’ve a project that I am just now running on, and I have been on the look out for such info.
I loved up to you’ll obtain carried out right here. The caricature is attractive, your authored subject matter stylish. nevertheless, you command get bought an edginess over that you would like be delivering the following. unwell without a doubt come more beforehand again since precisely the same nearly a lot often inside case you defend this hike.
Keep up the wonderful work, I read few content on this site and I believe that your web site is very interesting and has got sets of superb info .
I like looking through and I believe this website got some really utilitarian stuff on it! .
WONDERFUL Post.thanks for share..more wait .. …
Very interesting info !Perfect just what I was searching for!
Some truly interesting points you have written.Assisted me a lot, just what I was searching for : D.
This is a very good tips especially to those new to blogosphere, brief and accurate information… Thanks for sharing this one. A must read article.
I was very pleased to find this web-site.I wanted to thanks for your time for this wonderful read!! I definitely enjoying every little bit of it and I have you bookmarked to check out new stuff you blog post.
Simply desire to say your article is as amazing. The clearness in your publish is simply excellent and that i could assume you are a professional on this subject. Fine with your permission let me to take hold of your RSS feed to keep updated with impending post. Thanks 1,000,000 and please keep up the rewarding work.
I?¦ve been exploring for a bit for any high quality articles or weblog posts in this sort of space . Exploring in Yahoo I finally stumbled upon this site. Reading this information So i am satisfied to express that I have a very good uncanny feeling I found out exactly what I needed. I most indisputably will make certain to don?¦t forget this web site and provides it a look on a relentless basis.
Good day! I could have sworn I’ve been to this blog before but after reading through some of the post I realized it’s new to me. Anyhow, I’m definitely happy I found it and I’ll be book-marking and checking back frequently!
I gotta favorite this site it seems very beneficial handy
My website: порно русское смотреть
My partner and I stumbled over here from a different website and thought I might check things out. I like what I see so now i’m following you. Look forward to checking out your web page yet again.
Thank you for sharing excellent informations. Your website is so cool. I’m impressed by the details that you?¦ve on this blog. It reveals how nicely you understand this subject. Bookmarked this web page, will come back for more articles. You, my pal, ROCK! I found simply the info I already searched everywhere and simply couldn’t come across. What an ideal web site.
Ponto IPTV a melhor programacao de canais IPTV do Brasil, filmes, series, futebol
My website: порно студенток
of course like your web-site however you need to take a look at the spelling on several of your posts. Many of them are rife with spelling problems and I in finding it very bothersome to tell the reality on the other hand I?¦ll definitely come again again.
Its excellent as your other content : D, thankyou for putting up.
Great beat ! I would like to apprentice at the same time as you amend your web site, how could i subscribe for a weblog site? The account aided me a applicable deal. I had been a little bit familiar of this your broadcast offered brilliant clear idea
I have been absent for some time, but now I remember why I used to love this website. Thanks , I’ll try and check back more often. How frequently you update your website?
Your style is so unique compared to many other people. Thank you for publishing when you have the opportunity,Guess I will just make this bookmarked.2
Fantastic site. Plenty of helpful information here. I’m sending it to some pals ans also sharing in delicious. And certainly, thanks to your sweat!
You actually make it seem so easy together with your presentation however I in finding this matter to be really one thing that I believe I would never understand. It sort of feels too complicated and very large for me. I’m taking a look forward in your next submit, I will try to get the cling of it!
Merci pour les bons post. Je actuellement recherche ce chose pour un jour. Les articles et caractéristiques que vous montrez , je n’étais pas au courant . Je pourrait être suivant votre site Web maintenant et J’espère vous pouvez beaucoup plus sentiments et idées.
I am happy that I observed this site, precisely the right information that I was looking for! .
Great line up. We will be linking to this great article on our site. Keep up the good writing.
I really like your writing style, good info , thanks for posting : D.
I delight in, cause I discovered exactly what I was taking a look for. You’ve ended my four day lengthy hunt! God Bless you man. Have a great day. Bye
Hello! I know this is kinda off topic however I’d figured I’d ask. Would you be interested in exchanging links or maybe guest authoring a blog post or vice-versa? My blog addresses a lot of the same topics as yours and I think we could greatly benefit from each other. If you’re interested feel free to shoot me an email. I look forward to hearing from you! Fantastic blog by the way!
What i do not understood is in fact how you are no longer really a lot more well-preferred than you may be right now. You are very intelligent. You understand thus significantly relating to this matter, produced me individually imagine it from so many numerous angles. Its like men and women aren’t fascinated except it is something to do with Woman gaga! Your own stuffs great. At all times care for it up!
I’m now not positive where you are getting your info, however good topic. I needs to spend some time studying much more or figuring out more. Thanks for excellent information I used to be on the lookout for this info for my mission.
Pretty nice post. I just stumbled upon your blog and wished to say that I’ve truly enjoyed browsing your blog posts. After all I will be subscribing to your feed and I hope you write again soon!
Keep functioning ,splendid job!
Keep up the wonderful piece of work, I read few articles on this site and I believe that your website is very interesting and has got circles of great information.
I am not sure where you are getting your info, but great topic. I needs to spend some time learning much more or understanding more. Thanks for magnificent info I was looking for this info for my mission.
F*ckin’ remarkable things here. I am very satisfied to look your post. Thank you so much and i am looking ahead to contact you. Will you please drop me a e-mail?
This blog is definitely rather handy since I’m at the moment creating an internet floral website – although I am only starting out therefore it’s really fairly small, nothing like this site. Can link to a few of the posts here as they are quite. Thanks much. Zoey Olsen
This is really interesting, You are a very skilled blogger. I have joined your rss feed and look forward to seeking more of your magnificent post. Also, I have shared your web site in my social networks!
What i don’t realize is actually how you’re not actually much more well-liked than you may be right now. You are so intelligent. You realize thus considerably relating to this subject, made me personally consider it from a lot of varied angles. Its like women and men aren’t fascinated unless it is one thing to accomplish with Lady gaga! Your own stuffs excellent. Always maintain it up!
Hi! Would you mind if I share your blog with my myspace group? There’s a lot of people that I think would really appreciate your content. Please let me know. Thank you
I am not really good with English but I come up this real easy to interpret.
Can I just say what a relief to find someone who actually knows what theyre talking about on the internet. You definitely know how to bring an issue to light and make it important. More people need to read this and understand this side of the story. I cant believe youre not more popular because you definitely have the gift.
naturally like your web-site however you have to test the spelling on several of your posts. Several of them are rife with spelling problems and I find it very troublesome to inform the truth however I will definitely come back again.
Do you mind if I quote a couple of your articles as long as I provide credit and sources back to your website? My blog is in the very same niche as yours and my users would definitely benefit from a lot of the information you provide here. Please let me know if this alright with you. Many thanks!
Thanks for sharing superb informations. Your website is so cool. I’m impressed by the details that you have on this site. It reveals how nicely you perceive this subject. Bookmarked this web page, will come back for more articles. You, my pal, ROCK! I found just the information I already searched everywhere and just couldn’t come across. What a great website.
I reckon something genuinely interesting about your web site so I saved to favorites.
I like the helpful info you provide in your articles. I will bookmark your weblog and check again here frequently. I’m quite sure I will learn plenty of new stuff right here! Best of luck for the next!
Some times its a pain in the ass to read what website owners wrote but this website is real user genial! .
Those are yours alright! . We at least need to get these people stealing images to start blogging! They probably just did a image search and grabbed them. They look good though!
Hello! I know this is kinda off topic but I was wondering which blog platform are you using for this website? I’m getting fed up of WordPress because I’ve had issues with hackers and I’m looking at options for another platform. I would be great if you could point me in the direction of a good platform.
Pretty! This was a really wonderful post. Thank you for your provided information.
I believe this web site contains some real wonderful info for everyone : D.
hi!,I love your writing very so much! share we be in contact more approximately your article on AOL? I require a specialist in this space to unravel my problem. Maybe that is you! Having a look forward to see you.
It’s hard to find knowledgeable people on this topic, but you sound like you know what you’re talking about! Thanks
Hi, I think your site might be having browser compatibility issues. When I look at your website in Safari, it looks fine but when opening in Internet Explorer, it has some overlapping. I just wanted to give you a quick heads up! Other then that, fantastic blog!
I like this post, enjoyed this one appreciate it for posting.
Thanks a bunch for sharing this with all of us you really know what you are talking about! Bookmarked. Kindly also visit my website =). We could have a link exchange arrangement between us!
Very interesting details you have remarked, regards for posting.
Wohh precisely what I was looking for, appreciate it for posting.
Heya i am for the first time here. I found this board and I find It really useful & it helped me out much. I’m hoping to provide something back and aid others such as you helped me.
I discovered your weblog website on google and check just a few of your early posts. Proceed to keep up the excellent operate. I just additional up your RSS feed to my MSN News Reader. Searching for forward to studying more from you in a while!…
great points altogether, you just won a new reader. What might you suggest in regards to your put up that you just made a few days in the past? Any sure?
I precisely wanted to say thanks once again. I am not sure what I would’ve created in the absence of these points shown by you over my area of interest. Completely was a real hard circumstance in my view, nevertheless seeing a specialised avenue you processed that took me to cry over delight. Now i’m happy for the advice and as well , hope that you are aware of a powerful job that you are undertaking teaching people today via your blog post. I am sure you haven’t come across all of us.
I would like to thnkx for the efforts you have put in writing this blog. I am hoping the same high-grade blog post from you in the upcoming as well. In fact your creative writing abilities has inspired me to get my own blog now. Really the blogging is spreading its wings quickly. Your write up is a good example of it.
I also think so , perfectly written post! .
Very interesting subject , thanks for posting.
Hey there! I’ve been following your weblog for a long time now and finally got the courage to go ahead and give you a shout out from Porter Tx! Just wanted to mention keep up the excellent job!
I think other website proprietors should take this web site as an model, very clean and magnificent user genial style and design, let alone the content. You’re an expert in this topic!
F*ckin’ remarkable things here. I’m very satisfied to peer your article. Thank you so much and i’m having a look forward to touch you. Will you please drop me a mail?
I was suggested this website by my cousin. I am not sure whether this post is written by him as no one else know such detailed about my trouble. You’re incredible! Thanks!
Great write-up, I?¦m normal visitor of one?¦s blog, maintain up the excellent operate, and It is going to be a regular visitor for a long time.
Very interesting information!Perfect just what I was looking for!
Great blog! Is your theme custom made or did you download it from somewhere? A theme like yours with a few simple tweeks would really make my blog stand out. Please let me know where you got your theme. Cheers
whoah this blog is fantastic i like studying your articles. Stay up the great work! You recognize, many persons are hunting around for this info, you can aid them greatly.
I carry on listening to the reports speak about receiving boundless online grant applications so I have been looking around for the most excellent site to get one. Could you tell me please, where could i acquire some?
Hi, just required you to know I he added your site to my Google bookmarks due to your layout. But seriously, I believe your internet site has 1 in the freshest theme I??ve came across. It extremely helps make reading your blog significantly easier.
I regard something genuinely interesting about your site so I saved to my bookmarks.
This is very interesting, You’re a very skilled blogger. I’ve joined your feed and look forward to seeking more of your magnificent post. Also, I have shared your site in my social networks!
Hey there! I just wanted to ask if you ever have any issues with hackers? My last blog (wordpress) was hacked and I ended up losing months of hard work due to no backup. Do you have any methods to stop hackers?
Wow! This could be one particular of the most helpful blogs We have ever arrive across on this subject. Actually Great. I’m also an expert in this topic so I can understand your hard work.
I gotta bookmark this internet site it seems very beneficial very beneficial
I not to mention my buddies were found to be reviewing the great thoughts from your web page and so then got a horrible suspicion I had not thanked the web blog owner for those techniques. All the men had been as a result passionate to see them and now have very much been enjoying these things. Many thanks for actually being very accommodating and then for deciding upon varieties of magnificent subjects most people are really needing to be aware of. My very own honest regret for not saying thanks to earlier.
Hey, you used to write great, but the last few posts have been kinda boringK I miss your super writings. Past few posts are just a little bit out of track! come on!
I am impressed with this website , very I am a fan.
F*ckin’ remarkable things here. I am very glad to see your post. Thanks a lot and i’m looking forward to contact you. Will you kindly drop me a mail?
Nice post. I learn something more challenging on different blogs everyday. It will always be stimulating to read content from other writers and practice a little something from their store. I’d prefer to use some with the content on my blog whether you don’t mind. Natually I’ll give you a link on your web blog. Thanks for sharing.
Thanks for any other excellent article. The place else may anybody get that kind of info in such an ideal means of writing? I have a presentation subsequent week, and I am on the look for such info.
Hey very cool web site!! Guy .. Excellent .. Amazing .. I will bookmark your website and take the feeds alsoKI am happy to find so many helpful information right here in the post, we need work out extra strategies in this regard, thank you for sharing. . . . . .
obviously like your website but you have to check the spelling on several of your posts. A number of them are rife with spelling problems and I find it very troublesome to tell the truth nevertheless I will surely come back again.
I have been checking out a few of your stories and it’s pretty nice stuff. I will definitely bookmark your blog.
I reckon something truly special in this web site.
You should take part in a contest for one of the best blogs on the web. I will recommend this site!
Some truly interesting points you have written.Assisted me a lot, just what I was searching for : D.
Your home is valueble for me. Thanks!…
I like this web blog very much, Its a really nice place to read and find information.
I have been surfing online more than 3 hours today, yet I never found any interesting article like yours. It is pretty worth enough for me. In my view, if all site owners and bloggers made good content as you did, the web will be a lot more useful than ever before.
What i don’t understood is actually how you’re not actually much more well-liked than you may be now. You are very intelligent. You realize thus considerably relating to this subject, produced me personally consider it from a lot of varied angles. Its like men and women aren’t fascinated unless it’s one thing to do with Lady gaga! Your own stuffs nice. Always maintain it up!
Some genuinely superb information, Gladiola I discovered this.
Normally I do not read article on blogs, however I wish to say that this write-up very pressured me to check out and do it! Your writing style has been surprised me. Thank you, quite nice post.
I like this web site very much so much good info .
Perfect work you have done, this web site is really cool with excellent info .
Great line up. We will be linking to this great article on our site. Keep up the good writing.
I have been surfing on-line greater than 3 hours lately, yet I by no means discovered any interesting article like yours. It?¦s beautiful worth enough for me. Personally, if all web owners and bloggers made just right content material as you probably did, the internet will probably be a lot more useful than ever before.
Wow, awesome blog layout! How long have you been blogging for? you make blogging look easy. The overall look of your website is fantastic, as well as the content!
I reckon something genuinely special in this web site.
Keep up the fantastic piece of work, I read few content on this internet site and I believe that your site is real interesting and contains circles of wonderful info .
You can certainly see your enthusiasm in the work you write. The world hopes for even more passionate writers like you who aren’t afraid to say how they believe. Always follow your heart.
I’m not sure exactly why but this website is loading very slow for me. Is anyone else having this issue or is it a issue on my end? I’ll check back later and see if the problem still exists.
I am curious to find out what blog platform you’re utilizing? I’m having some small security problems with my latest website and I’d like to find something more secure. Do you have any suggestions?
I have been absent for some time, but now I remember why I used to love this website. Thank you, I¦ll try and check back more frequently. How frequently you update your website?
I am glad to be a visitant of this everlasting website! , regards for this rare information! .
Its such as you learn my thoughts! You appear to know a lot about this, like you wrote the e book in it or something. I think that you just can do with some p.c. to power the message house a bit, but instead of that, that is fantastic blog. A fantastic read. I will certainly be back.
hello!,I like your writing very much! share we communicate more about your post on AOL? I require a specialist on this area to solve my problem. Maybe that’s you! Looking forward to see you.
Where should the carriage be in relation to the machine when changing the belt?
thanks for posting. in case it helps anyone: removing the side panels is unnecessary – you can pretty easily access the stepper motor bolts if you look with some good lighting.
tip for those with x-axis layer shifting + grinding noises: with the motor engaged (for example while heating in prep for a print) try moving the 4-wire motor cable that’s tucked up with the pin + above in the printer’s housing – if you hear the motor click on and off (it’s pretty quiet you have to put your ear to the motor) with wire movement the underlying metal wiring has come loose/failed somewhere and thus the motor may disconnect intermittently depending on carriage movement + chance.
since fargo was out of stock for a new wiring harness I was able to fix it temporarily by pulling the wires down (leave the pin removed), squeezing all the kinks out, and using a rigid (reflectix) tape over the 2″ section that was the source of failure (identified with the motor sound trick described above)
I expected it to be the kink right below the wire connector (where it plugs into the motor) but it was actually one of the loops about 4-6″ down the wires
i think other folks have a failure right where the metal pin touches it at the rear end
hth