On the surface, Tinkercad may seem too basic to create anything worthwhile but with the right knowledge, you can use even the simplest CAD programs to create some impressive designs.
Tinkercad is a free browser-based CAD program that is used by many beginners as an introduction to 3D modeling. Tinkercad is very easy to use and extremely beginner-friendly but is also capable of creating more complex designs. Here are some tips for getting started in Tinkercad.
The Workplane
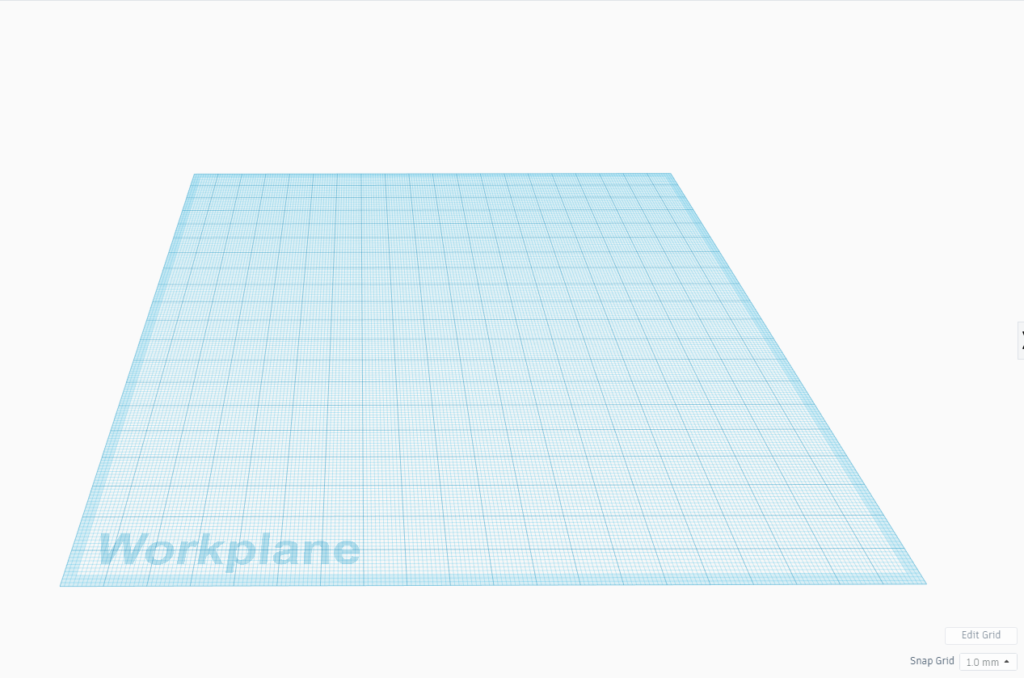
When you create a new project in Tinkercad the first thing you will see is a large blue grid. This is the Workplane. It represents the horizontal X and Y axis and is where you will begin creating your objects. When moving an object on the Workplane they will automatically snap to points on the grid, the default being in increments of 1mm. This allows for quick and easy alignment. You can also create a new Workplane based on the face of an object by pressing W and then selecting the face you want the plane to be created on. This can be handy when creating slanted planes and aligning objects vertically.
The Camera
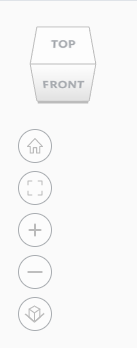
The ability to quickly and easily control the camera in a CAD program is one of the first things any user should learn, and thankfully Tinkercad makes this very easy and intuitive. Right-click to rotate the camera, middle-click to pan the camera, and use the mouse wheel to zoom in and out. You can also select preset camera views using the camera cube in the top left corner.
Creating and Transforming Objects
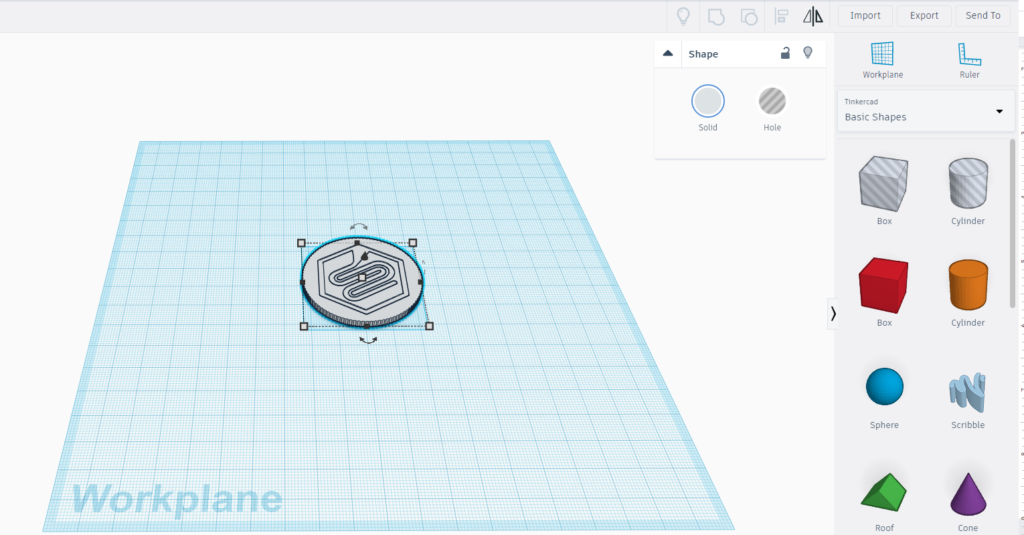
Modeling in Tinkercad differs from most other CAD programs in several ways, the biggest being how you create objects. Instead of starting with a 2D sketch, Tinkercad opts for a shape based design. Tinkercad has a large selection of premade basic shapes which you can drag onto the workplane to create your model. There are also several other sections of premade shapes such as letters, characters, and connectors. Having premade shapes limits what is possible in Tinkercad but allows the user to quickly and easily create something. Simply drag and drop the shape onto the Workplane where you can begin editing things like the shape’s dimension, radius, and other basic features.
Importing and Exporting
Tinkercad allows you to import existing STL, OBJ, and SVG files and edit them directly in the Tinkercad environment. Making it easy to quickly edit an existing file, or create something new from a 2D .svg file.
Another surprisingly useful feature is Tinkercad’s ability to export files directly to your compatible 3D printer using cloud-based services like Astroprint or Makerbot’s cloud service. Granted you must have an account with these services and a compatible printer, but features like these are nice to see in such a basic utility.
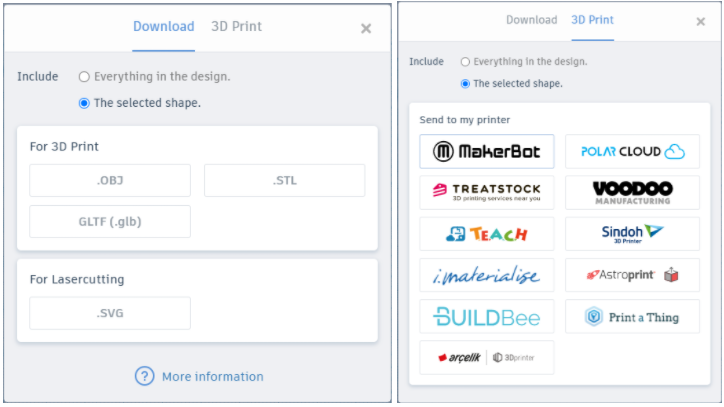
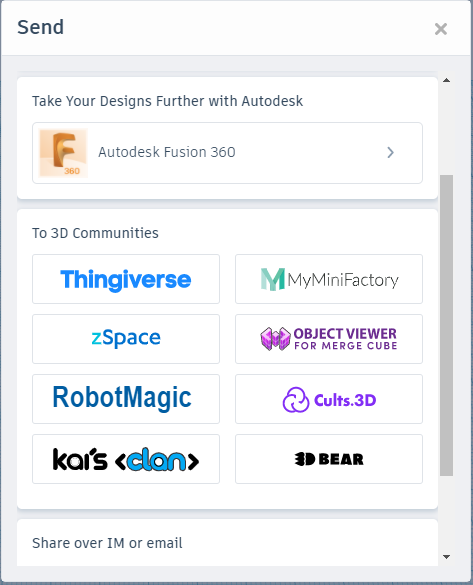
Tinkercad also makes it very easy to send your design to sites like Thingiverse or MyMiniFactory. Using Tinkercad’s “Send To” option allows you to quickly and easily send your model to the site of your choice, or even straight to Autodesk Fusion 360. This integrated compatibility is what makes Tinkercad such a user friendly and easy to use program.

1xbet promo code. Click Here:👉 http://https://www.lafp.org/includes/pages/1xbet-promo-code-1xbet-bonus.html
1xbet promo code. Click Here:👉 http://https://www.lafp.org/includes/pages/1xbet-promo-code-1xbet-bonus.html
Промокод 1xbet. Click Here:👉 http://www.newlcn.com/pages/news/promo_kod_1xbet_na_segodnya_pri_registracii.html
To the fargo3dprinting.com administrator, You always provide great examples and real-world applications, thank you for your valuable contributions.
Este site é realmente demais. Sempre que acesso eu encontro coisas boas Você também pode acessar o nosso site e descobrir detalhes! conteúdo único. Venha descobrir mais agora! 🙂
I am impressed with this web site, real I am a big fan .
Code Promo 1xBet. Click Here:👉 https://popvalais.ch/wp-includes/inc/?code-promo-1xbet-burkina-faso-78-000xof.html
chat sex live. Click Here:👉 https://porno-sex.cam/
1xbet промокод бонус. Click Here:👉 https://www.medtronik.ru/images/pages/bonus_kod_na_1xbet_pri_registracii_6500_rubley.html
Artificial intelligence creates content for the site, no worse than a copywriter, you can also use it to write articles. 100% uniqueness,7-day free trial of Pro Plan, No credit card required:). Click Here:👉 https://bit.ly/3Py2Iv6
Artificial intelligence creates content for the site, no worse than a copywriter, you can also use it to write articles. 100% uniqueness,7-day free trial of Pro Plan, No credit card required:). Click Here:👉 https://bit.ly/3Py2Iv6
Experience the full power of an AI content generator that delivers premium results in seconds. 100% uniqueness,7-day free trial of Pro Plan, No credit card required:). Click Here:👉 https://stanford.io/3V6fSRi
Experience the full power of an AI content generator that delivers premium results in seconds. 100% uniqueness,7-day free trial of Pro Plan, No credit card required:). Click Here:👉 https://stanford.io/3V6fSRi
Artificial intelligence creates content for the site, no worse than a copywriter, you can also use it to write articles. 100% uniqueness, scheduled posting to your WordPress :). Click Here:👉 https://stanford.io/3FXszd0
Artificial intelligence creates content for the site, no worse than a copywriter, you can also use it to write articles. 100% uniqueness, scheduled posting to your WordPress :). Click Here:👉 https://stanford.io/3FXszd0